
Remember the good old days when books were a reliable source of trustworthy information about how best to tackle a certain task?
Well, the internet can be a reliable source, but it can be hard to pick the right from the wrong within a deep sea of information. And when it comes to cutting carbon composite components, I all too often see the wrong information being shared. With that, I thought it was time to resurface this article that was my very first with Escape Collective (published March 2023).
Now updated under the Threaded series banner, this article is a guide to cutting carbon components. Whether you need to trim the length of a fork steerer tube, a fancy aero seatpost, or narrow those expensive mountain bike handlebars, this article has you covered.
If you’ve got the confidence to cut down a metal tube, then there’s little reason to fear carbon, plus you may be surprised to learn that it’s a task that doesn’t require a long list of specialist tools. Really, all you need is some basic tools, a little patience, and the right techniques. Skip any of those and, well, you could be making an expensive and potentially unhealthy mistake.
The Threaded series is only made possible through the support of Escape Collective members. There are no ads, affiliate links, or weird kickbacks at play here, just pure independent and member-funded media.
As for me, I've had a passion for bicycling repair spanning over two decades, and it wasn't long into that journey that I became obsessed with the related tooling. It's now been a decade since I first started professionally reviewing tools intended for bicycle repair (and often covering tools that weren't originally designed for bicycles, but have proven to be wonderful).
If you survive through or just enjoy bicycle repair, then the wholly original Threaded series is sure to provide plenty of value.
The material
In the context of bicycles, carbon fibre reinforced plastic (CFRP) is a material that combines carbon fibres with a polymer to give it structure. Cutting it correctly is different from how you would attack a metal tube. The fibre-based and directional nature of this material means care is needed to ensure you don’t accidentally cause the carbon fibres to split or fray from the polymer, something commonly known as delamination. Furthermore, carbon fibre has poor heat dispersion properties meaning it can quickly overheat and dull tools in use.
Before I continue, it’s important to note that not all carbon components are what they claim to be. It’s not too rare to find seatposts and handlebars that offer a cosmetic carbon wrap with an aluminium internal construction. Before you plan a cut, look down at the cross-section of the tube for any obvious differences in layer structure. Full carbon components will have a consistent look, won’t be excessively cold to touch, and they don’t sound like a metal tube when you flick them. This article focuses on fully carbon components.
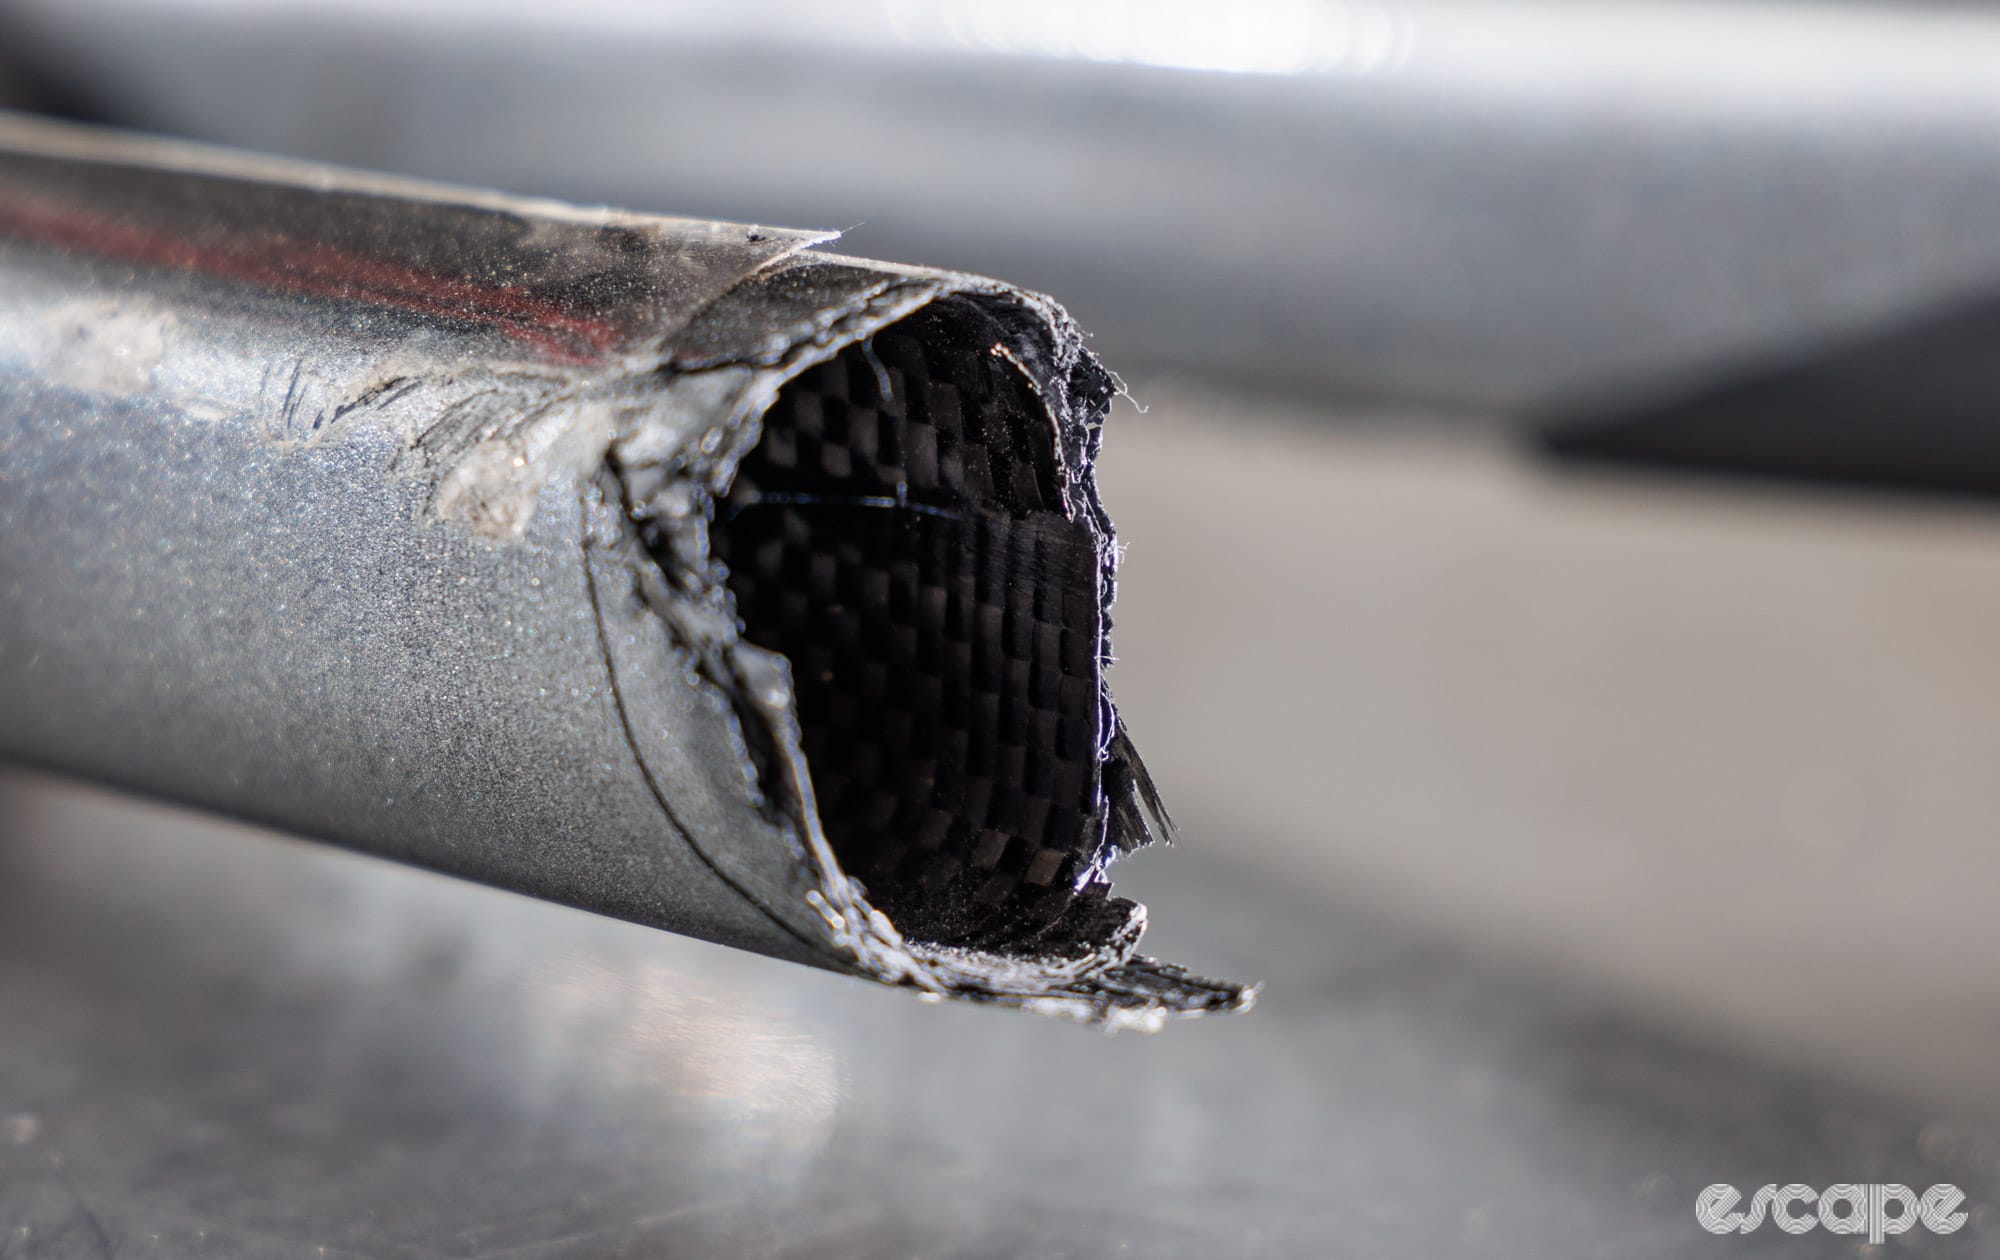
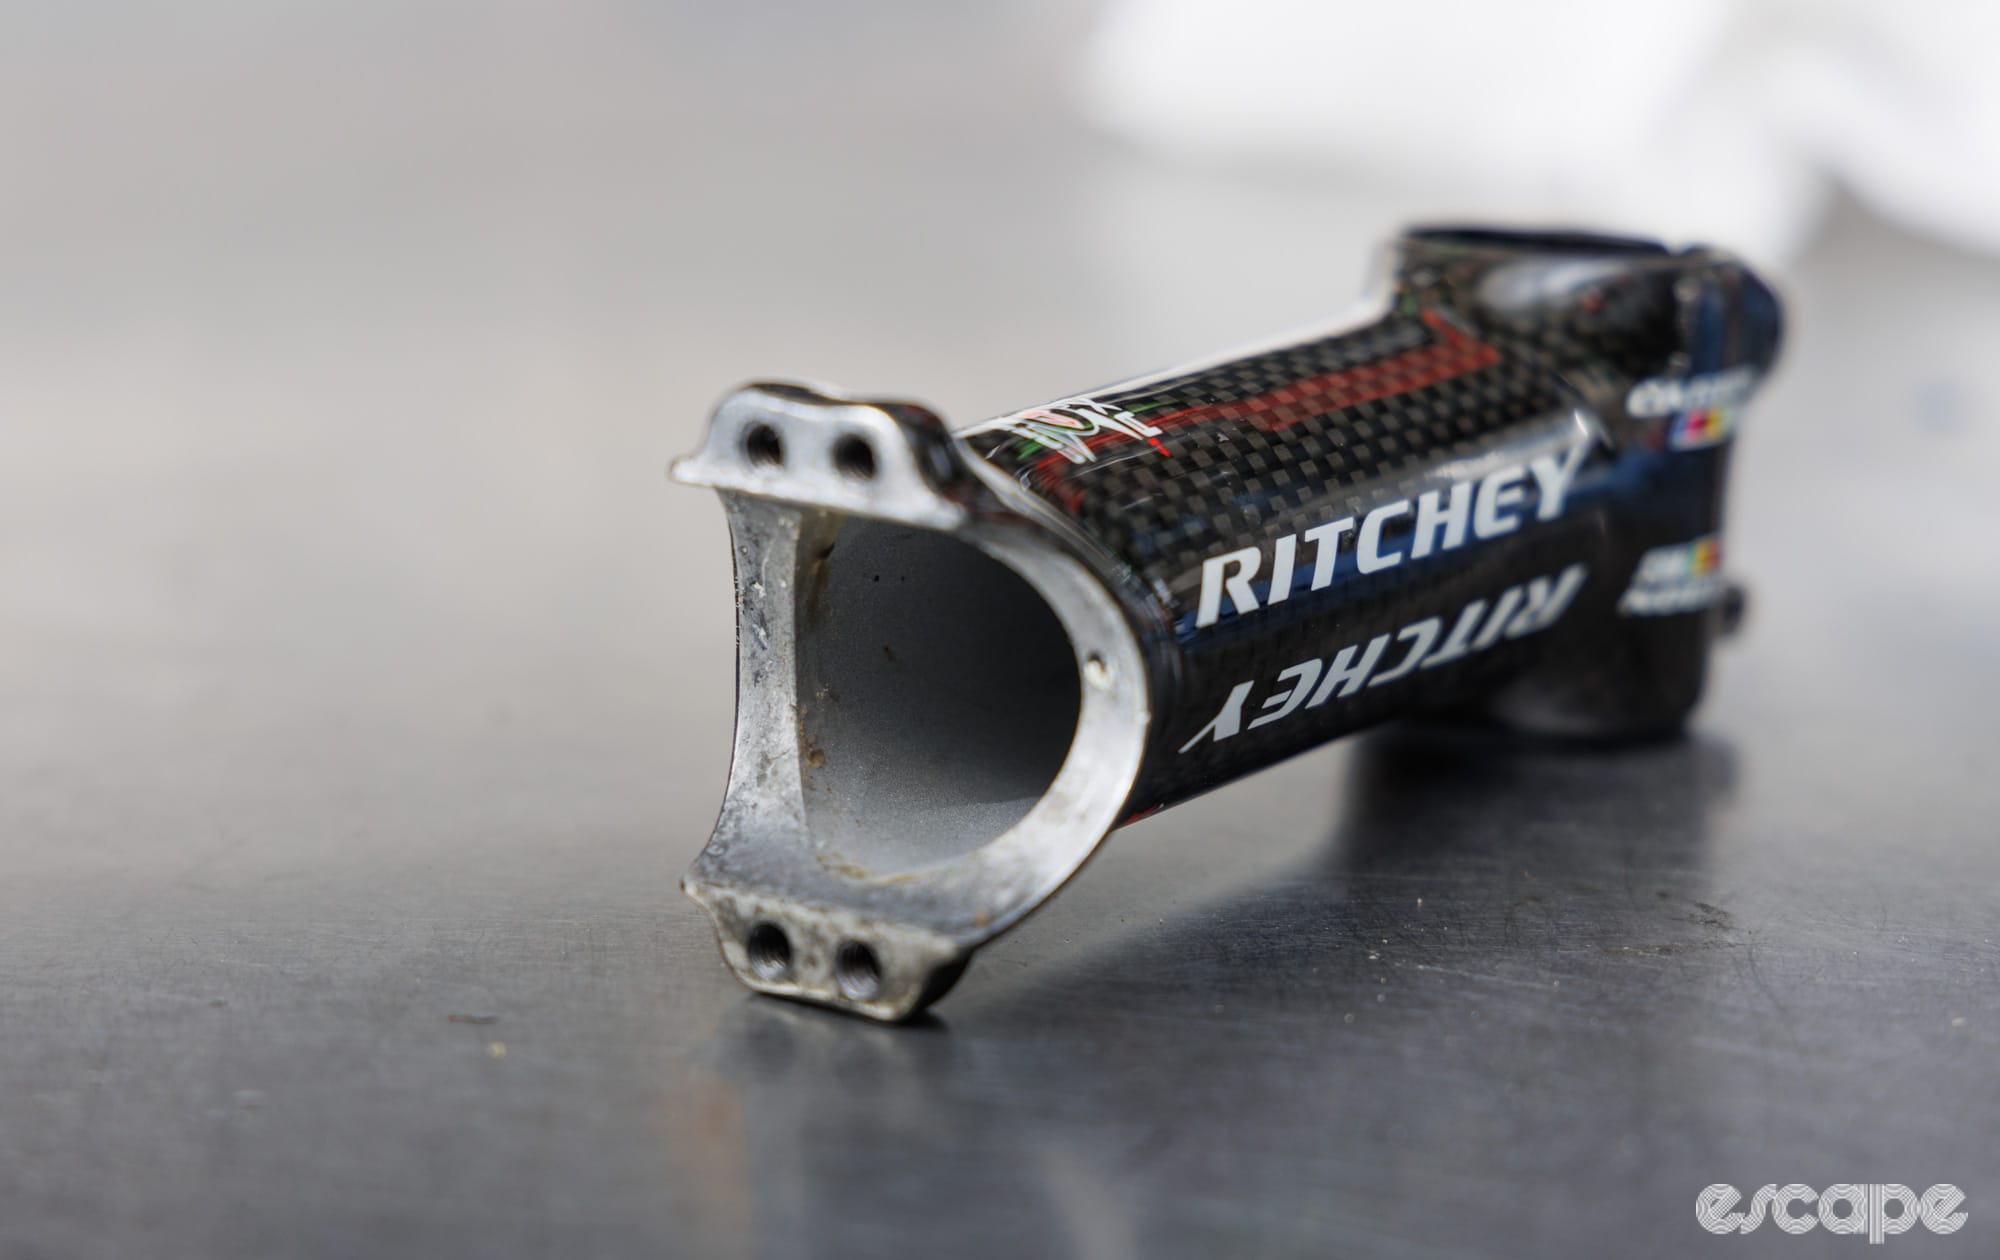
In cycling, you'll most commonly find CFRP used in hollow structures. Add in thin structural walls, and each layer can be critical to the function of the part. Meanwhile, carbon-wrapped components (such as the stem on the right) remain a thing, although they are increasingly rare.
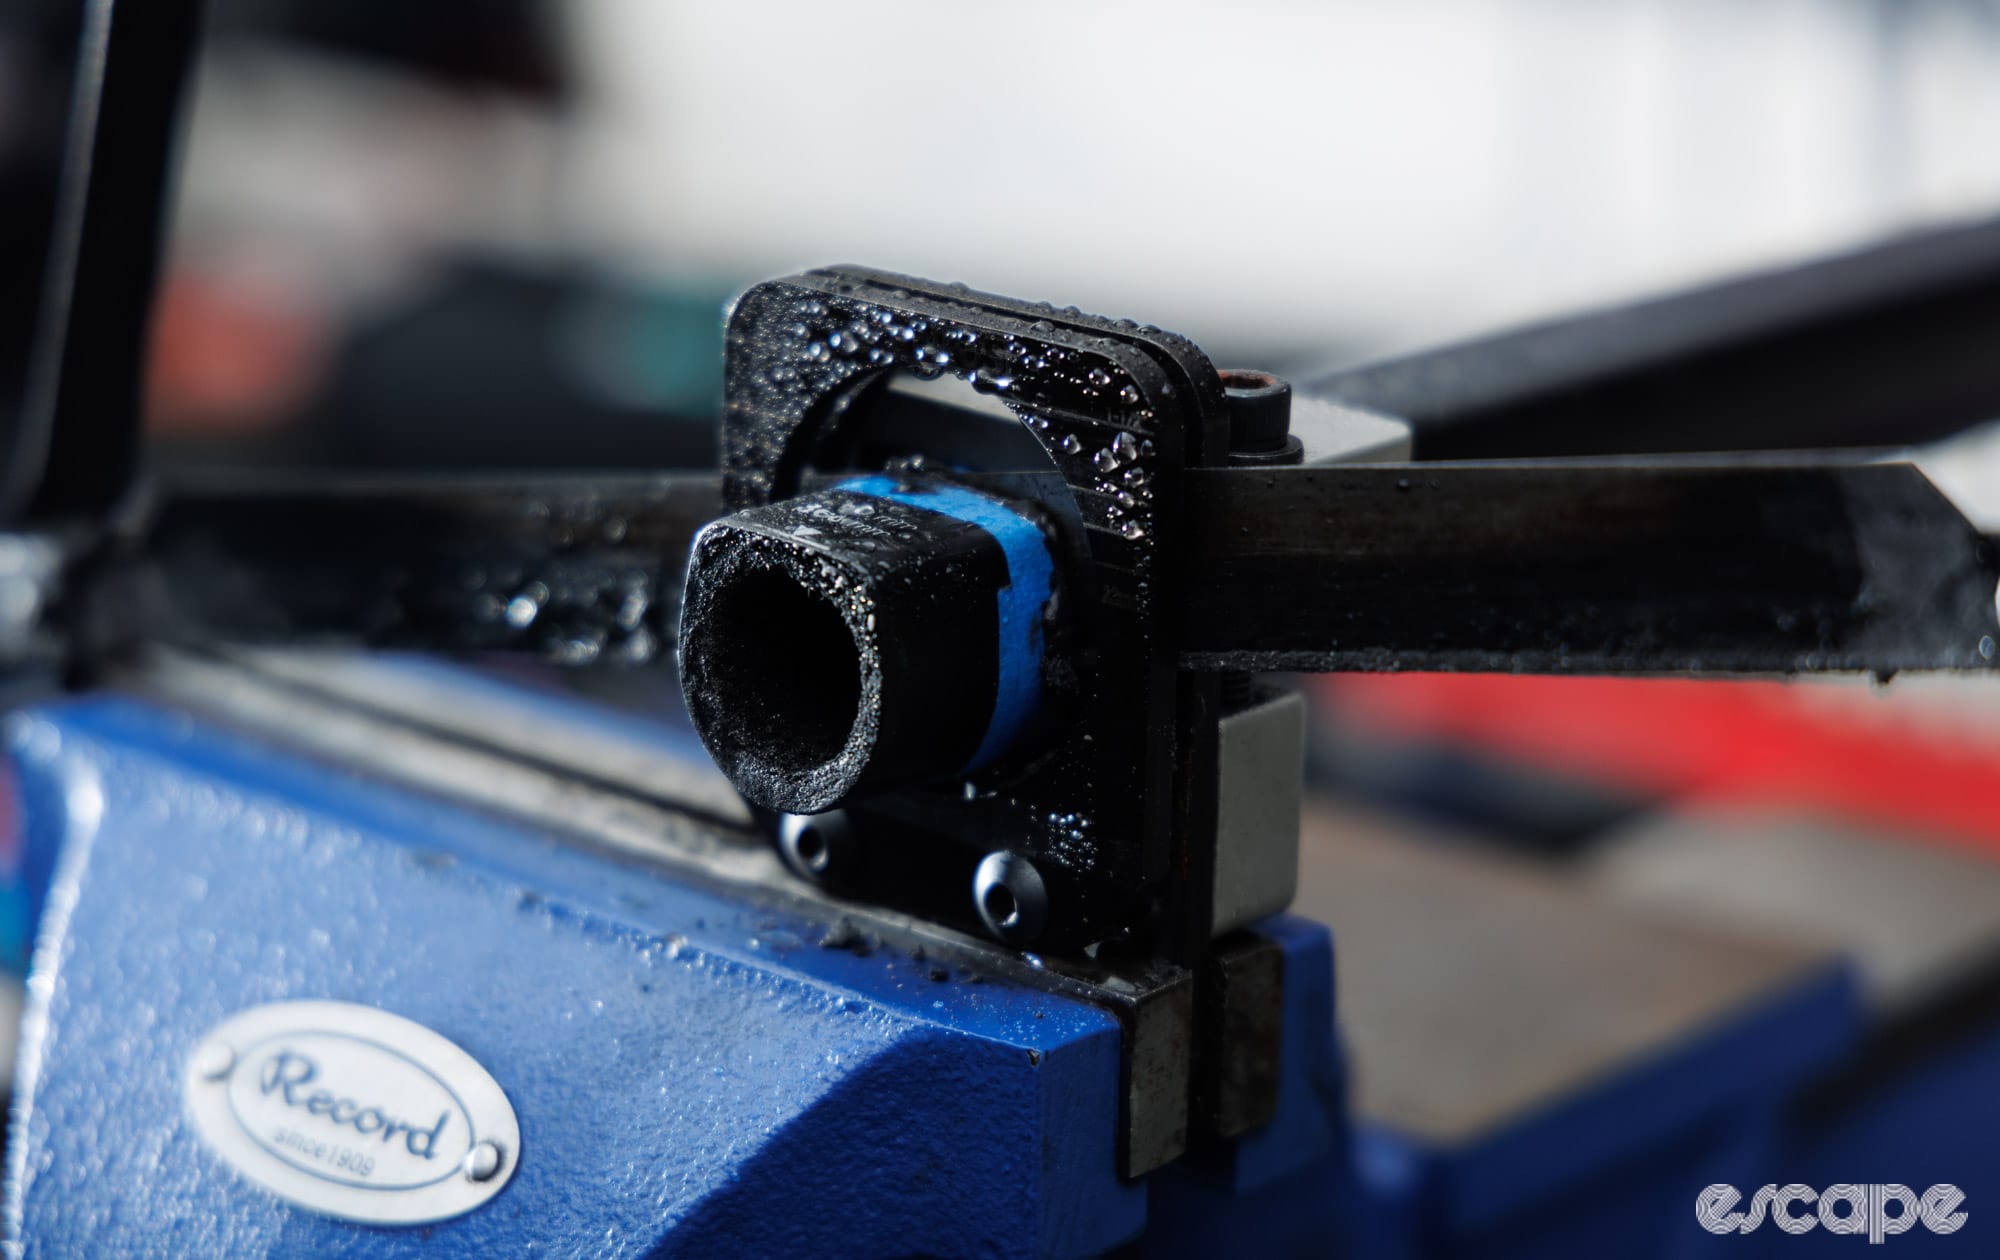
Great care is also needed to ensure the component you’re cutting doesn't have an additional accessory or component stuck in it. It’s common to find seatposts with Di2 battery holders, fork steerers with compression plugs, and even mountain bike handlebars with tools in them. Before you cut your tube, make sure it’s hollow and empty.
And then, of course, there are the disclaimers. Cutting a carbon fibre tube doesn’t require an engineering degree, but equally, it’s a material that needs to be treated with care and respect. It’s entirely possible to make a carbon component unsafe to use through incorrect cutting and installation methods. If you're not confident or struggle to build an Ikea Billy bookcase, have a professional do it.
The tools and supplies
Ah yes, the tools – my favourite part.
At the most basic level, cutting carbon fibre components requires an appropriate cutting tool, a guide to keep the cutting tool running straight, and an abrasive for post-cut finishing. It’s one of those tasks where the more experience you have, the fewer tools you’ll seemingly need. You also want to take basic safety precautions to keep fine particle dust out of your lungs.
OK, let’s talk about the right tools.
Did we do a good job with this story?