I’ve got four full days of the recent MADE Bike Show still fresh in my mind (and legs), and I have been thinking about commonly recurring questions in relation to geometry and how a bike feels. I recently wrote about the basics of geometry, and in this second part, I’ll attempt to explain the various features of geometry that affect the way the bike feels.
Alright, let’s dive right in.
Handling geometry is an interesting problem to solve – much like bike fit, there isn’t necessarily a ‘right’ answer, and what works for one rider might not be ideal for another. Designing the geometry of a bicycle requires a holistic approach, because each variable can affect the others.
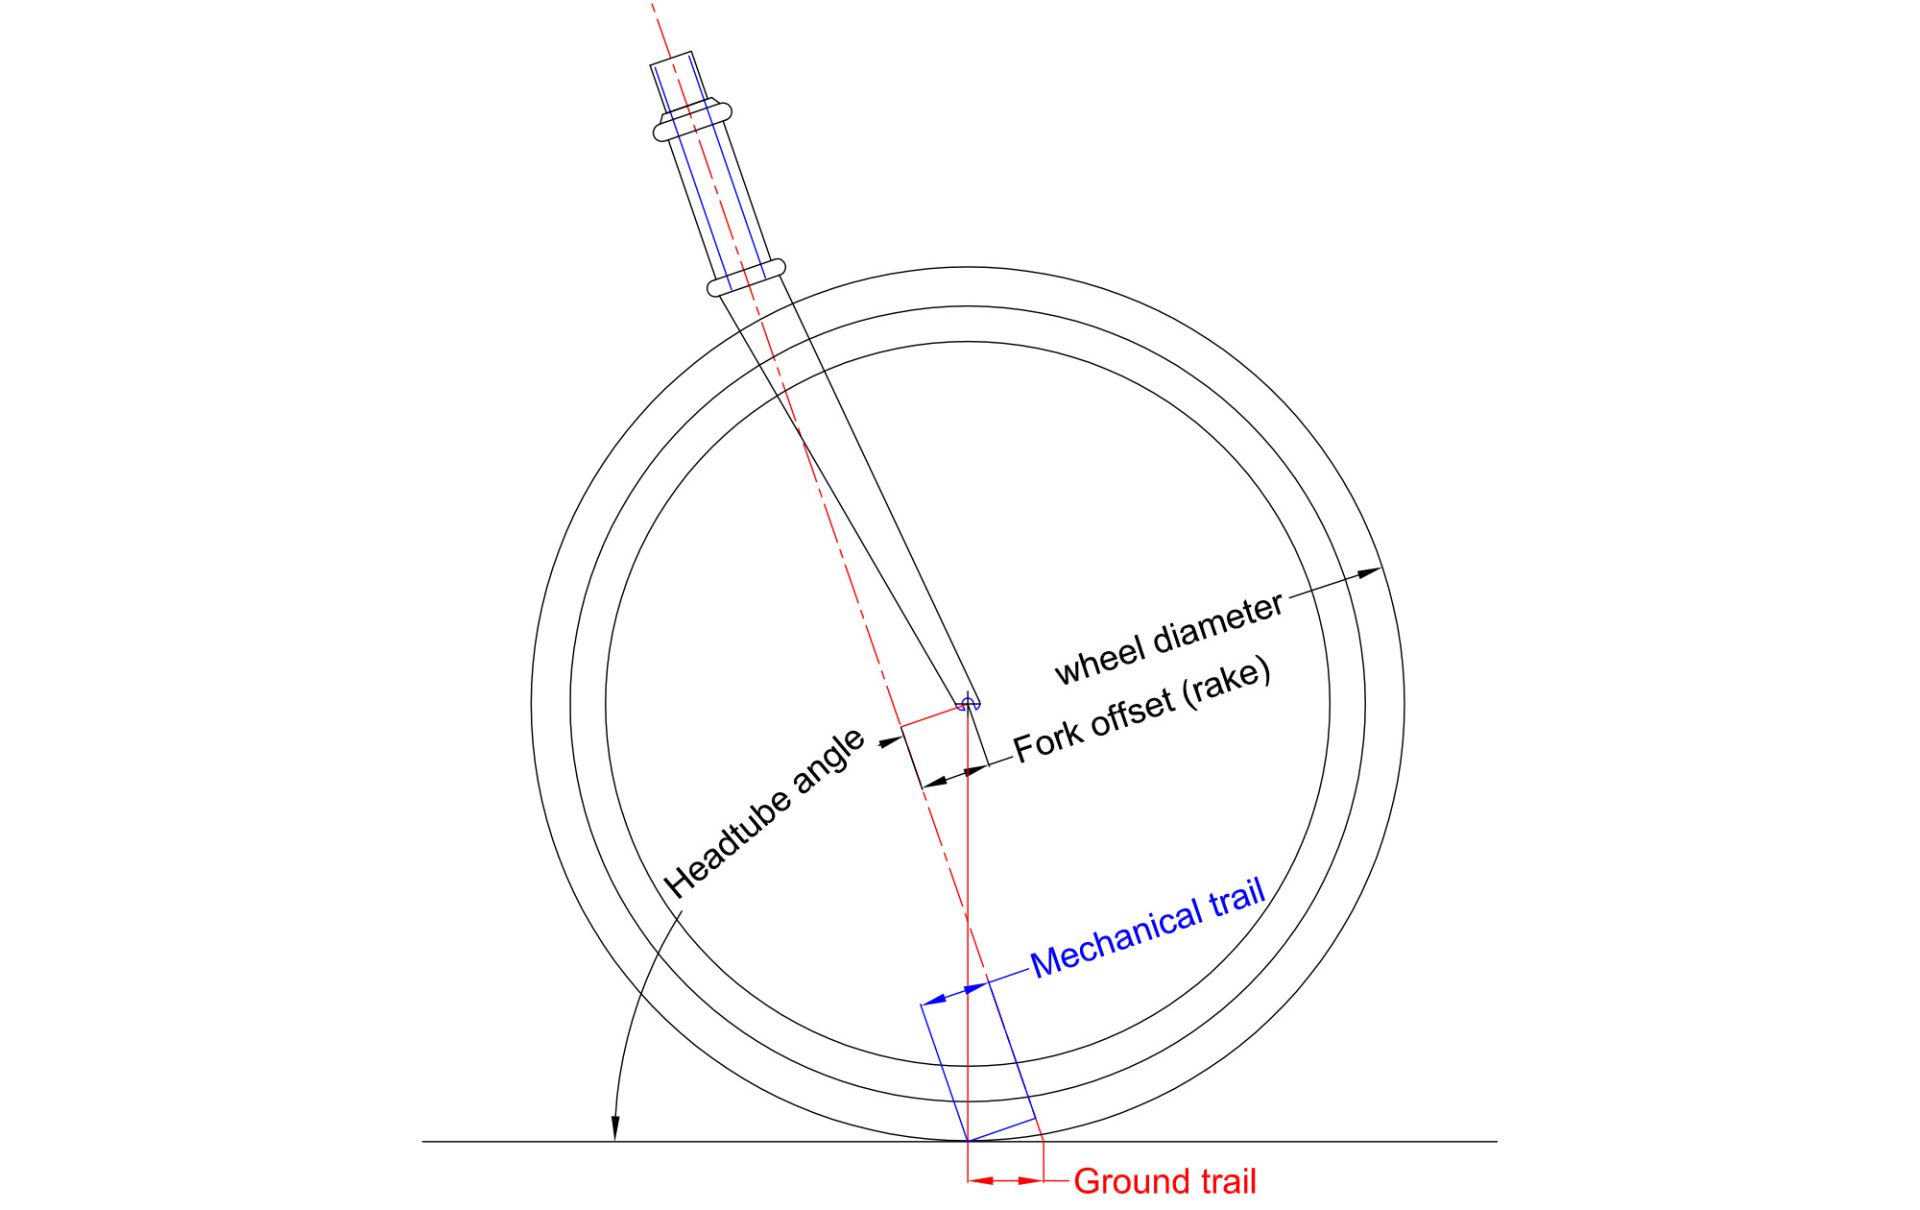
One of the most important variables with the steering geometry is the trail (the distance the tire contact patch is behind the centerline of the steering axis), which is a combination of the head tube angle, the fork offset and the wheel size (the overall diameter including the tire). This can be considered as the ‘castor effect’ – meaning that pushing the bike forward makes the wheel want to point straight. Broadly, more trail is more stable, less trail will tend to feel twitchy. It is more nuanced than that, which we will get to, I’m just looking to define the terms to start.
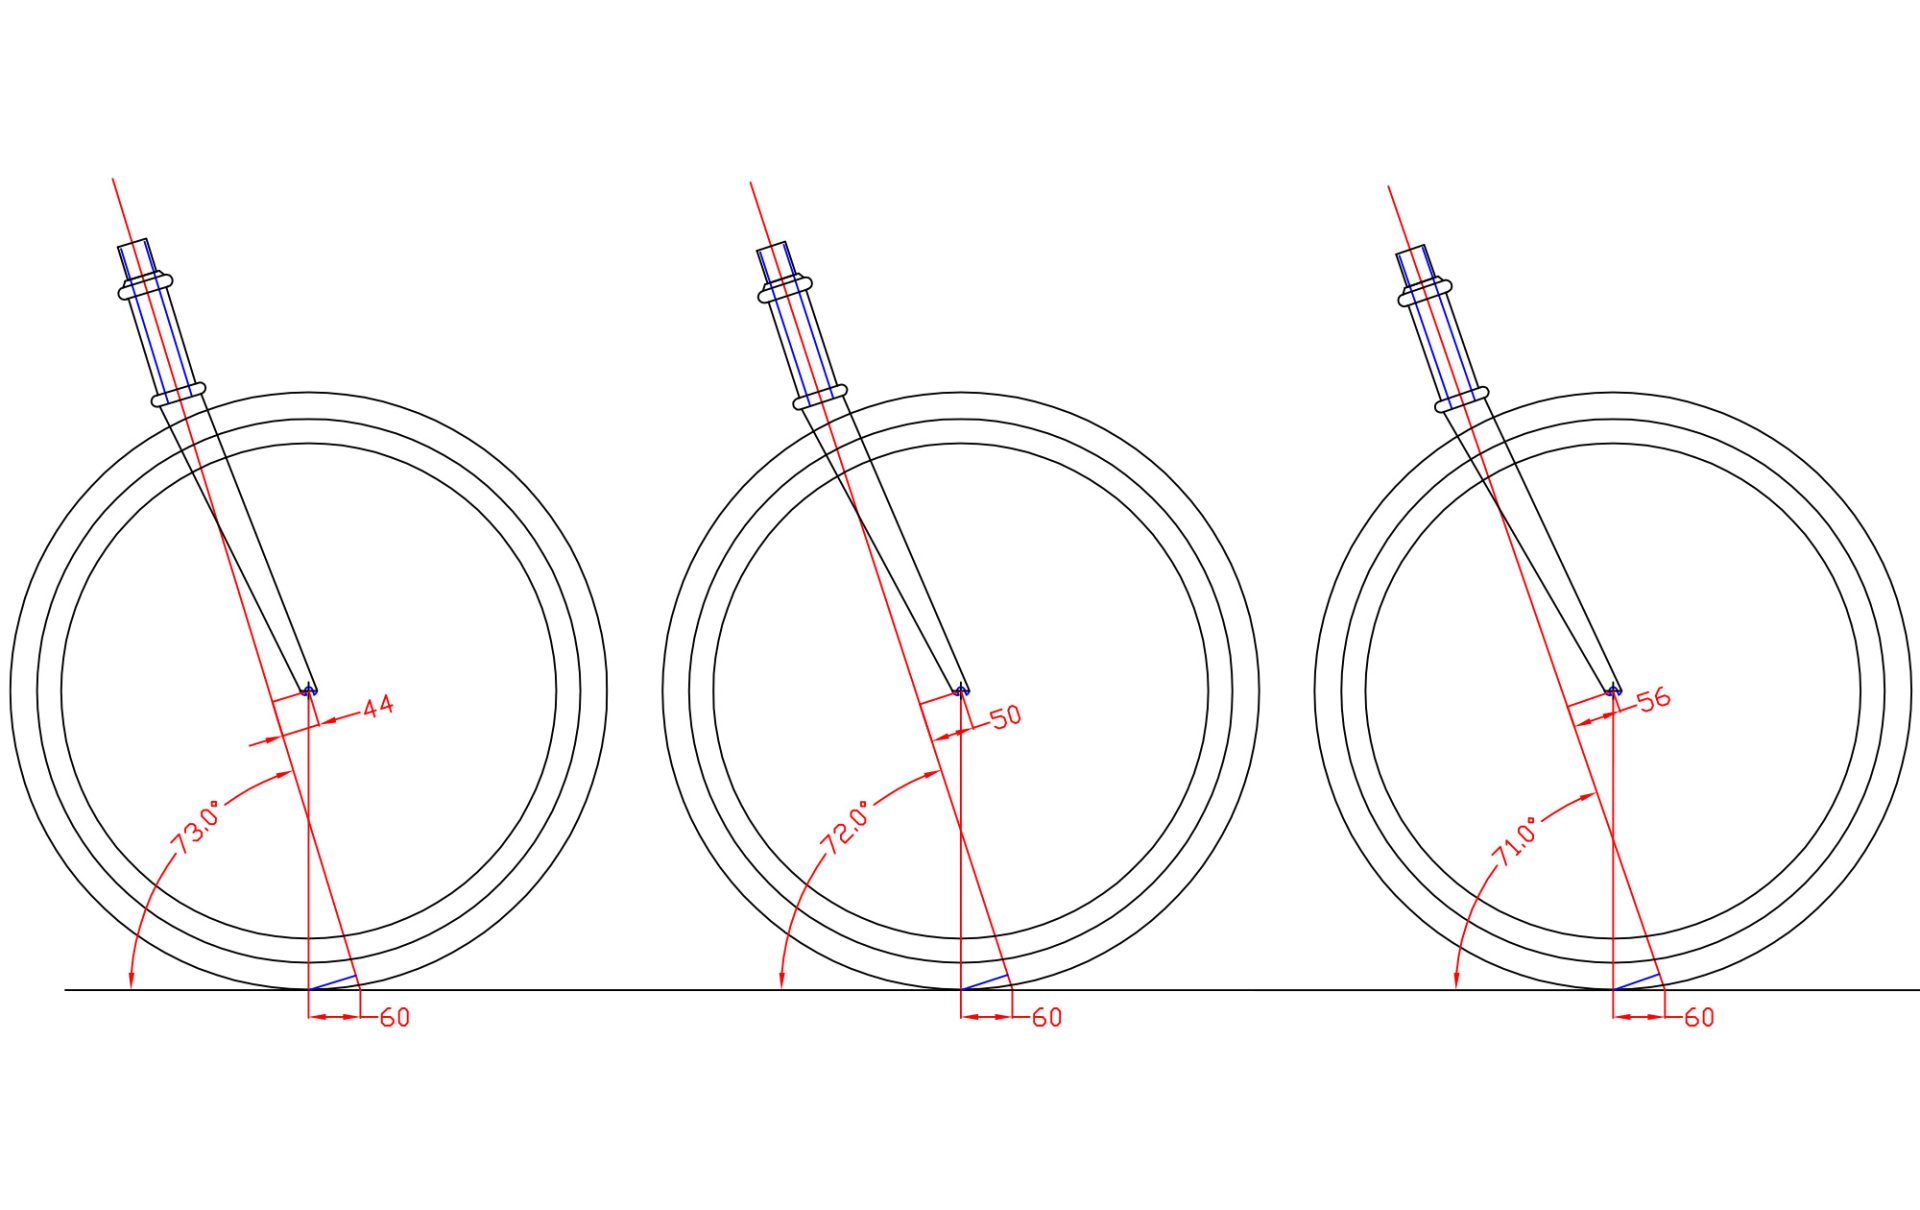
My point above about taking a holistic effect can be well explained in the measurement of a trail figure. For example, a bike with a slacker 71° head angle and a long 56 mm fork offset would have the same trail figure as a bike with 73° head angle and short 44 fork offset. It’s the same trail number on paper, but with the front wheel in a different position and therefore changing the rider weight distribution between the two wheels, it produces a different ride experience.
Technically speaking, the term ‘trail’ as traditionally used with bicycles is actually ‘ground trail’. Real trail, or mechanical trail, is defined as the perpendicular distance from the steering axis to the tire contact point. This denotes the actual leverage of the offset, and would perhaps be the better number to use, if the industry wasn’t so familiar with using ground trail. For the purpose of comparing geometry and handling characteristics, consistently using ground trail is good enough.
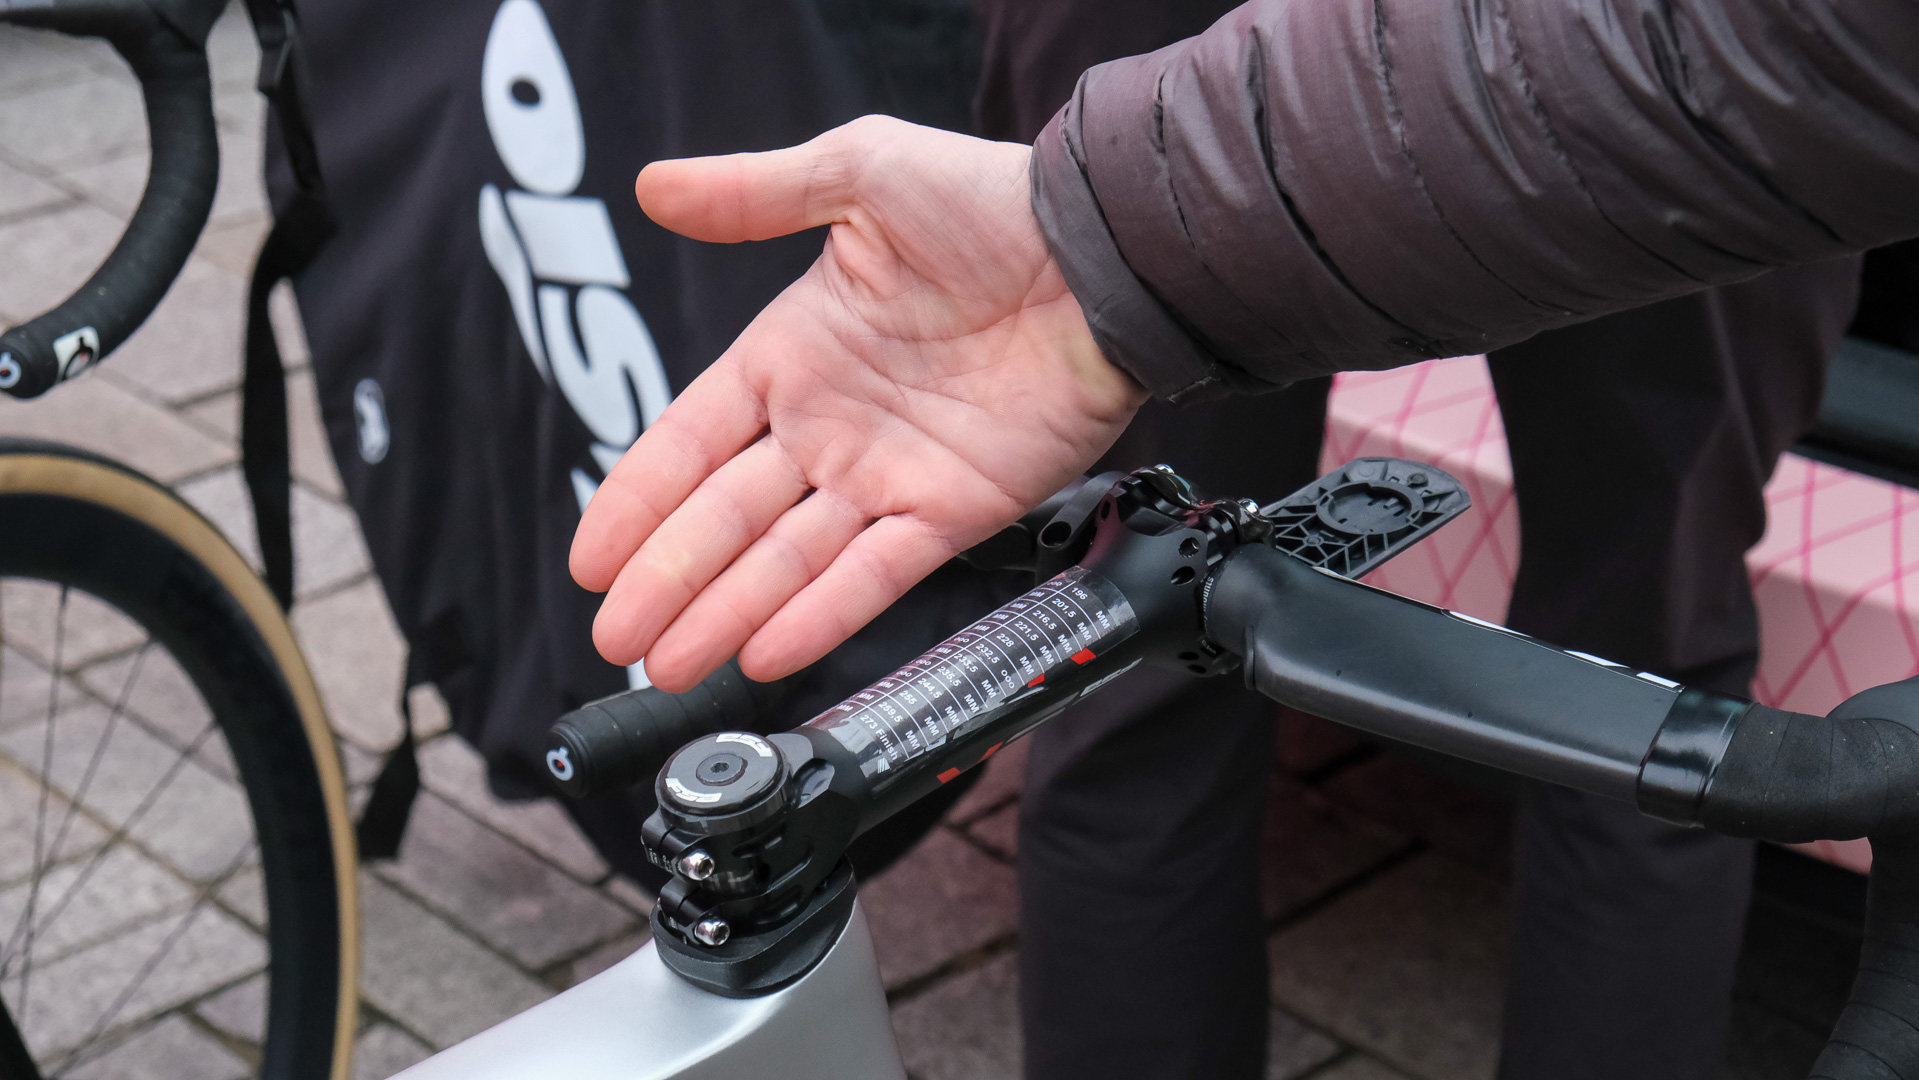
Stem length and handlebar width also influence handling, which can be considered as the ‘tiller effect’, i.e. how much input movement is required to turn the wheel. The shorter the stem or narrower the bar, the more reactive the handling becomes. Another often-overlooked consideration is that of tire width, and even what the grip of that tire looks like – the wider the tire, often the more effort is required to steer it against the ground surface. This is referred to as ‘pneumatic trail’.
With production bikes, often there have been compromises made for manufacturing efficiencies – for example, only having one fork offset for all sizes. In this scenario, to make a small size frame fit the rider, the headangle would be slackened. This helps the fit by shortening the reach, and simultaneously increasing the front-center, allowing a shorter rider to better reach the bars and (hopefully) avoid toe-wheel overlap. But it compromises the handling because the slacker headangle causes the trail to increase, making a slower-steering bike than might be desired.
Thankfully a lot of production bikes are now using three or four different fork offsets across the size range, so that the trail figure is maintained for more consistent handling. (As the headangle is slackened, the fork offset must be increased to maintain the trail. On a small bike, using more fork offset also gives additional help with lengthening the front-center and maintaining toe-wheel clearance).
As an example of cost-saving compromises – not picking on Specialized here, but Dave Rome recently published the geometry chart for the new Allez road bike – I noticed there is only one fork rake across all sizes, and a 69.5° headangle on the smallest size. The resulting 81 mm of trail is more common with MTB-orientated gravel bikes than a road bike, whereas the larger sizes get 73,° giving 58 mm of trail.
From personal experience of riding and racing road bikes, I have found a trail figure right around 58 mm to be the sweet spot for balancing responsive and stable handling. When combined with good weight distribution and appropriate frame stiffness, this produces a bike that feels reassuring and can be ridden hands-off at speed, yet can be easily flicked to a new line to avoid a pothole or a suddenly-deviating fellow competitor.
My own research into and understanding of how the geometry variables create the feel of the bike began with my first performance bike back in 1991 – a steel Stumpjumper Comp, back when mountain bikes had geometry similar to a road bike and no suspension. I was used to that quick handling and it worked great for riding in the woods (rather than big mountains) back then. Nine years later, I moved to the US and bought a 2000 Stumpjumper – things had moved on a bit (although the modern long-and-slack geometry was still a long ways off!), as it was aluminium with a suspension fork. I didn’t like it much, until I swapped the fork for a non-suspension corrected rigid fork. Suddenly the handling felt familiar and was working much better for me. I wanted to understand why, so I drew up the bike geometry to see what the shorter fork had done.
That shorter fork was quite impactful. The seatangle had steepened (but I could maintain my saddle setback with the adjustment at the rails), and the headangle had also steepened, reducing the trail. The bottom bracket height had lowered. I was running a 130 mm stem, so the fast handling of the low trail was tempered a little by the greater input movement. This helped me understand more about what made a mountain bike feel good to me – being lower to the ground, so I feel ‘in’ the bike rather than ‘on’ it. And with a relatively low trail.
Stem length and bar width should not be overlooked. Some years later, I lent this bike to a friend who was visiting, and who was also used to riding rigid bikes but not as tall as me. And so we swapped to a 60mm stem. When we hit the trail Joe was really struggling to keep the bike on the singletrack – I was laughing at him until I tried it; the handling with the 130 mm stem was already close to being too fast and twitchy; the shorter stem pushed it too far.
The dynamics of a singletrack vehicle are surprisingly complicated considering that riding a (well-designed) bike is relatively easy! A lot of safely controlling a bicycle at variable speeds is practice – being used to how the bike responds and the inputs required. A few years ago I built myself a new mountain bike with somewhat more modern steering geometry than the road-bike-like geometry I had ridden for over 20 years. On the first ride, going uphill I struggled to keep the bike straight; I felt that I was fighting the bars. But by the third ride, I had adapted and could easily hold the line. And, after that learning period, I definitely appreciated the more stable front end and longer front-center when descending at speed.
The interesting thing with typical bicycle geometry is the spring factor or the self-centering of that castor effect. At high speeds, the front wheel wants to remain pointing forward. But at low speeds, instead of opposing your hands, the handlebars tend to continue in the direction of the turn. This difference is due to what is known as ‘fork flop’, which is the vertical component of the mechanical trail – this causes the head tube to lower as the bars are turned. Therefore, the rider’s weight creates a force acting to turn the handlebars away from straight.
This is where the different ways of achieving a given trail figure result in different handling. If you imagine a 90° head tube angle, then there would be no fork flop as the frame height wouldn’t change as the bars are turned. As that head tube angle gets slacker, the fork flop factor gets larger, which is important to be aware of when designing the steering geometry.
In my last article, I mentioned the importance of considering the height of the pedals from the ground, rather than only looking at bottom bracket drop. I included the Q-factor (the width between the outside of the crank arms) as something that needs to be considered when thinking about the needed pedal height – as the cranks get further away from the centerline, the pedals get closer to the ground when the bike is lent over.
This is something I didn’t fully take into account when designing my e-cargo bike with a Bosch mid-drive motor that has very wide cranks. I now have to watch for pedal strikes when cornering! Conversely, a narrow Q-factor allows an extra low pedal height. When I built a replica of Graeme Obree’s bike using a custom narrow bottom bracket and crankset (the Q-factor was 82 mm compared to 147 mm for a Shimano road crank), I was able to lower the bottom bracket by 35 mm and maintain the same cornering clearance.
To conclude, no one number can tell you how a bike will handle – the combination of the steering geometry variables and the rider’s weight distribution will come together to create the overall system. To get the full story, we also have to bring in the stiffness properties of the frame and components, the tires and the tire pressure, and even personal riding style. As a final point, it’s also important not to get lost in the figures and instead acknowledge our predilection that what we are used to will tend to feel ‘right’.
The Whys of Bike Tech is a column from American-based custom frame maker Rob English of English Cycles. This column looks to mix opinions from hands-on experience with a mechanical engineering background to break down commonly misunderstood subjects and myths in the world of cycling tech.
What did you think of this story?
