Riding is Life
Lights

Comments

Threaded #7: WorldTour tools and New Tools Day 

Race bikes? Nah, let's talk about the tools!

Dave Rome
by Dave Rome 19.01.2024 Photography by
Dave Rome
More from Dave +

Welcome back to Threaded! This week’s edition is a mixed bag of tool-related things seen in use at the Tour Down Under and a dose of New Tools Day. And don’t worry, the next Threaded will return back to the promised theme of bearings! 

Ok, so my time at the Tour Down Under didn’t go exactly to plan. I was four days into taking more pictures of pro bikes than I could ever possibly use before I got called home to play nurse. All is OK, but as a result, I missed out on a few tool-related conversations I’d planned to have. However, the good news is that it meant playtime with some new tools awaiting my return. 

Mechanic-lite and the Tour Down Under booths 

The Tour Down Under presents unique complications for the travelling WorldTour teams. It’s a long way to transport a team’s worth of gear, and oversized baggage hasn’t gotten cheaper as of late. Many more-established teams rely on leaving old work stands, pumps, supplies, and even bulky components in Australia to return to a year later. Many mechanics then pack a simplified set of tools to be stored in a suitcase amongst the team tee-shirts and budgie smugglers

Two tool boxes with Beta tools sit on a table.
Some mechanics travel with their usual race toolboxes …
A portable tool folder filled with bicycle tools.
… While others go more minimalist with folding type cases or tool rolls. You’ll find extra photos of toolboxes at the end of this article.

Indeed tool kits are kept to the bare minimum. Larger tools and mechanical supplies are often sourced locally, as evident by the number of Ryobi and Ozito power tools (the house brand of Australian hardware store monopoly Bunnings). And it’s common to find non-sponsor-correct maintenance products simply due to what’s available nearby. 

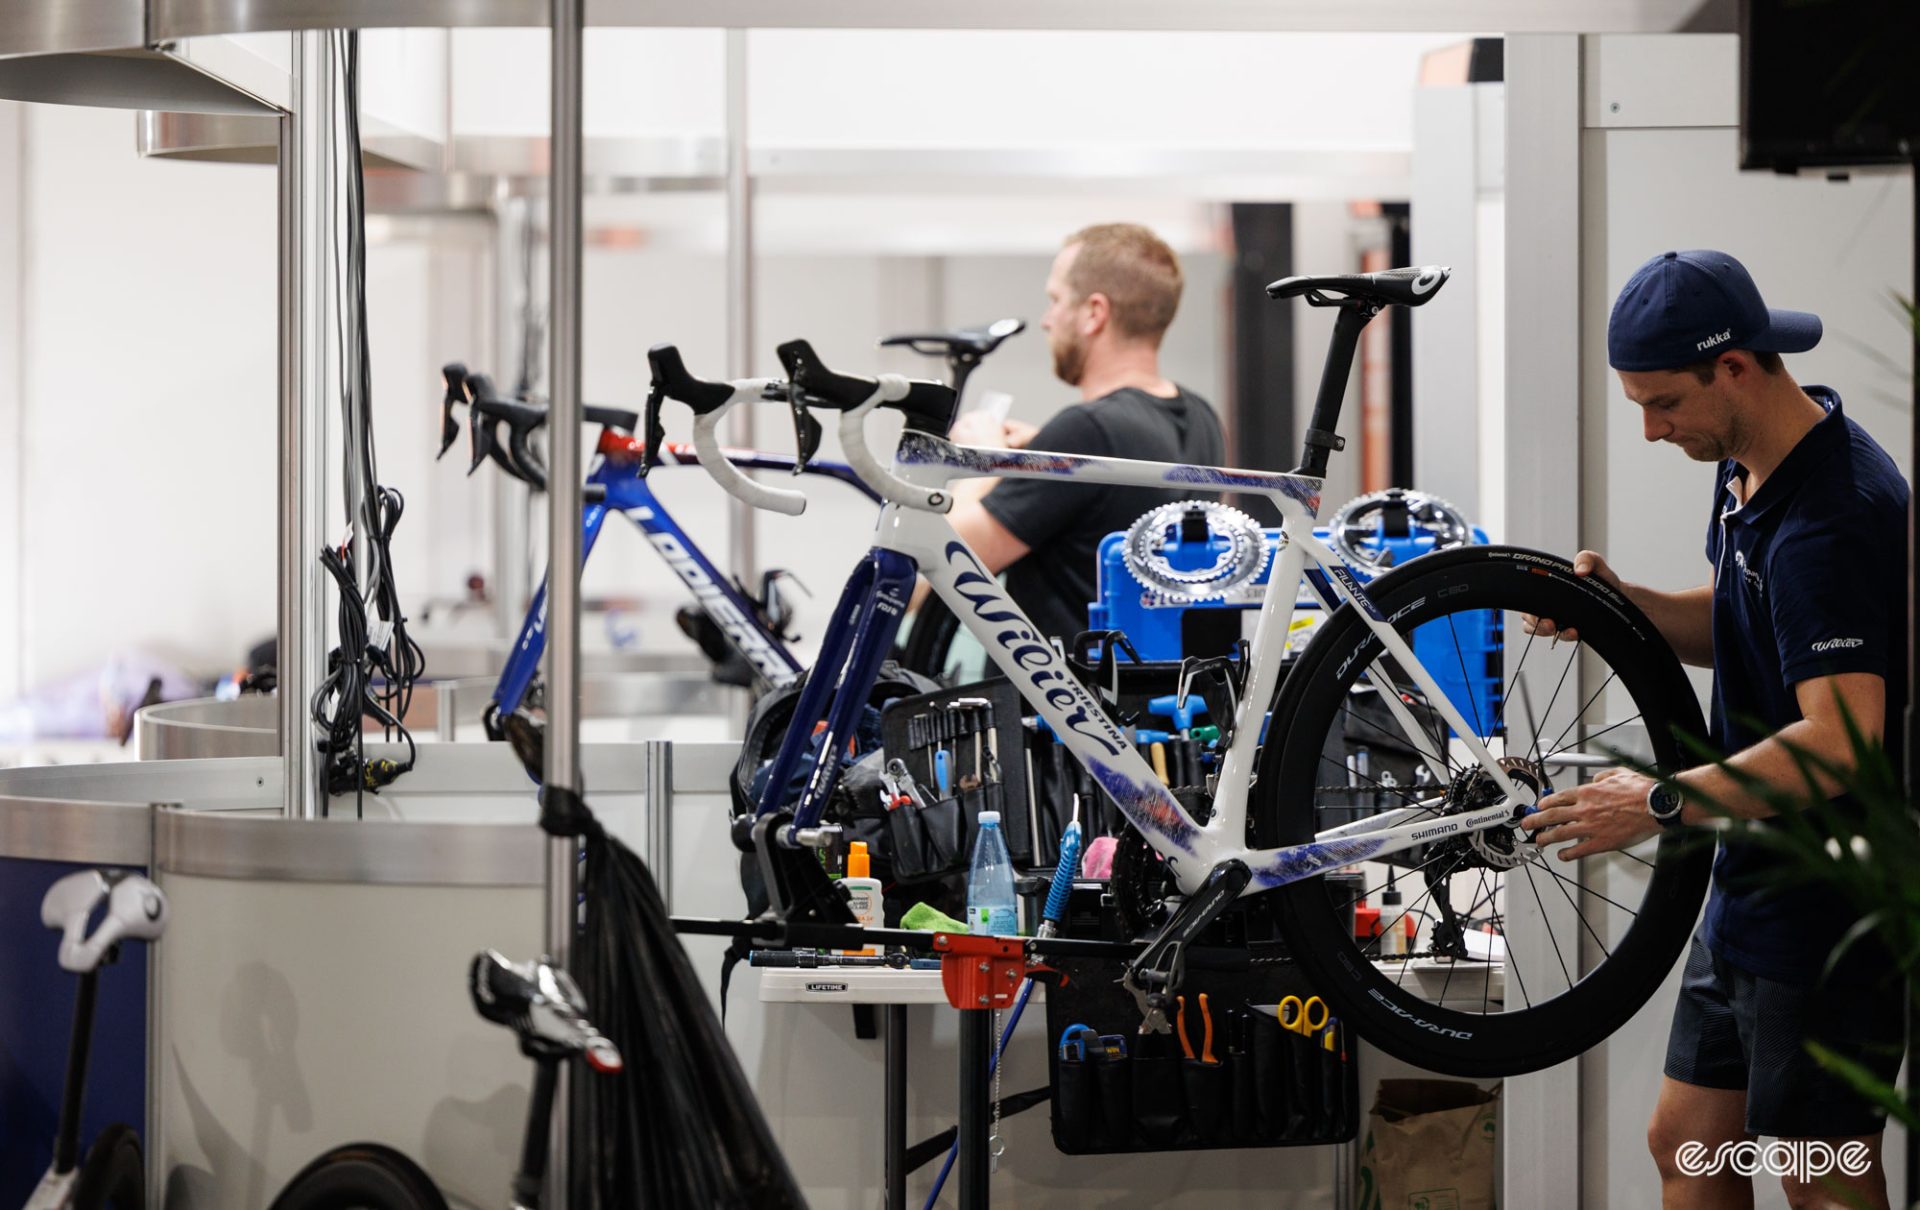
Once on the ground, the Tour Down Under provides a large gazebo for the mechanics to work in that doubles as a strange zoo-like arena for the public to get up and close with bikes of their favourite pros. Each team is given a small semi-circle patch of working area, just enough room to work on a bike mounted into a race repair stand (bike held by the fork dropout with the front wheel removed). If a team has a second mechanic, you’ll find that person working on the side, often in a walk-way. 

A Bora-Hansgrohe mechanic bleeds the SRAM brake of a Specialized team bike.
Tight working quarters for the mechanics at the Tour Down Under. Here Bora-hansgrohe mechanic Marek Bajfus bleeds a fresh SRAM brake.

However, while most mechanics strive for minimalism, a closer look does reveal a few cool tools in the mix. 

Measurements like a pro 

Things quickly get tricky because the Tour Down Under is the season’s first race. Often there are new riders with new bikes looking to get dialled. Cleat positions are constantly changing, and bike fits are being argued about. The team-issue tools related to this are far from small, and it’s common to see the bigger budget teams coming into town with a bikesettings.com kit protected within a foam-lined rifle case. 

A mechanic measures and marks the saddle while using a bikesettings tool.
Ineos-Grenadiers’ mechanic Richard Lambert checking measurements.

Modern bikes also present modern problems. Gone are the days of quickly dropping a headset spacer for a rider to try a slight position tweak, with many bikes now requiring more permanent changes (steerer cutting). And even something as simple as a steerer cut is made harder when the teams don’t have a bench vise handy; heck, they don’t even have a solid bench. 

Pro riders also have unique demands in bike fits where so much time in the saddle makes you highly sensitive to variance. That is then accentuated by often swapping between bikes, such as one that’s a full aero bike and one less weighty. The expectation is that these bikes fit and feel exactly the same to the millimetre, and that’s no small task for the mechanic. 

A walk amongst the mechanics quickly reveals that many rely deeply on the measurement kits from bikesettings.com; in any one day I’d see the mechanics from EF Education First, Lidl-Trek, Ineos Grenadiers, Groupama-FDJ, Visma-Lease a Bike, and so on using what’s effectively the same tool. It’s a brand that doesn’t readily sell to the public, but rather deals with equipping the professional racing world with multiple kits taken to all corners of the earth. 

Speaking with long-time Ineos-Grenadiers mechanic Richard Lambert, the team has nine of these kits, which are periodically brought back to the service course for calibration checks as an overzealous baggage handler could mean an unexpected and unwanted change to a rider’s fit. It’s also critical that all team mechanics are in sync with how each measurement is taken and then how the tool is used – each team seemingly has its nuanced differences.

Bikesettings tool in use.
A stable and level platform is the base to consistent measurements.
Bikesettings tool in use.
Lidl-Trek mechanic Rasmus Stigaard with a tool from Bikesettings.com.

The tool works by bolting to the bike’s axles to form a known (and level) measurement base, and from there, dedicated extensions measure the X (horizontal, such as saddle fore-aft) and Y axis (vertical, such as saddle height). It’s all very repeatable, if not fiddly to setup and cumbersome to transport. Bigger picture, any such measurement tool can be used to provide incredibly accurate and repeatable results, but it’s up to the user to do so, and you then become beholden to the tool, where using any alternative tool or method will result in a different fit. 

Some of these kits also have team-specific modifications or features. Jesse Geisler, a Melbourne-based frame builder, fabricator (he sharpens cutting tools for likes of Baum, Prova, etc) and mechanic working freelance for the FDJ-Suez team brought along a bikesettings.com kit with a few pieces he’d machined himself in the goal of providing an even more rigid and square base to the jig. With a longer threaded extension for the axle (the pitch and axle size must be matched to the model of bike) the custom piece ensures a perfectly square interface for the tool’s base to attach to. 

A steel axle is displayed. The tool is used for adapting the bikesettings jig.
As solid as it gets. After learning that the stock bikesettings.com axle can give incorrect readings if installed on a fork/frame where the outside dropout isn’t perpendicular, Geisler made this axle.

Cool Tools, not just on Tuesday 

While the vast majority of mechanics use the tools provided by team sponsors or common items they’ve picked up over the years, you’ll occasionally find the rare gem lurking in the boxes of the tool nerds.

One example was found in the box of Lidl-Trek mechanic Rasmus Stigaard. The Braun Zentriboy is a compact wheel-truing device that securely clamps onto any shape of frame or fork, meaning a dedicated truing stand isn’t needed. Similar tools do exist, and you could even fashion your own (or even use a zip-tie, cut to the distance of the rim), but this is by far the nicest of its kind I’ve seen to date. 

A measuring gauge is clamped to the seatstay of a red Trek.
The Zentriboy installed a very narrow seat stay.
A tap-style tool is held.
Why does Stigaard carry this tool around the world? Clue, it’s related to the borrowing (*cough* stealing *cough*) of something critical for washing bikes and cars. It’s also occasionally used for adjusting bike racks or fixing the team truck.

Speed and repeatability is important in the WorldTour, and it’s always interesting to see the tools enabling this. Canyon-SRAM mechanics had race stands modified with a push-pull toggle clamp that simply closes onto the bike’s thru-axle – a design that saves a usual step in using such stands. 

A quick toggle clamp is adapter for use on a bicycle race repair stand.
A quick push-pull clamp makes a lot of sense for a stand that only ever seen 12 mm thru-axles.

Speaking of aligning things, Jesse Geisler had two machined aluminium discs with him that were the envy of most race mechanics who laid eyes on them. These precise discs replace the disc rotor, brake pads are removed, and the caliper loosened. The exact sizing creates a locked fit with the slot in the brake caliper, ensuring perfect caliper alignment every time (assuming the surfaces are faced correctly). Geisler plans to sell these just to road race mechanics, with a pair of 140 and 160 mm sized tools priced at €250. I, too, have been working on a solution to this same problem (to be shared in future), although my concept feels like child’s play in comparison. 

Two machined metal discs in a hand.
These disc brake caliper centering tools are the creation of Melbourne-based Jesse Geisler.

The usual buzz of electric tyre inflators has quickly gone from a rare novelty to the absolute standard. Most mechanics use larger 18V inflators from Makita, Dewalt, or similar simply because the batteries last for days. It’s also cool to see more and more mechanics using electric screwdrivers for repeated fastening (although I didn’t see my preferred Vessel in use), and small impact drivers are certainly now the norm for thru-axles (just be warned, a lot of teams do seem to wear out thru-axles by using these, so while it’s faster, it’s also a case of don’t do as the pros do). And as a random tangent, I was surprised to see just how many teams have gone back to using thru-axles with handles so that riders can undo wheels before the team car pulls up. 

A Makita 12V driver sits on a book.
Low-torque electric screwdrivers are a common sight.
A Snap-On impact driver sits on a bench.
Although slightly higher-torque impact drivers are even more common when teams use bolt-up (tooled) thru-axles.

And unfortunately, I didn’t see it first-hand, but there was talk of a neat lever-setting tool in the box of one team. No, I’m not talking about the UCI’s 3D-printed lever angle tool that’s incompatible with sprint shifters and even some lever hose nuts. And I’m also not talking about the Abbey Lever Setter which uses a derailleur hanger gauge to get hood heights even. Rather, it was a tool that apparently clipped into the central out-front computer mount and then offered a centred measurement base to set the hoods at an equidistant angle. Neat. 

New Tools Day! 

Pedro’s

I’m a big fan of having dedicated tools for common tasks, so for example, the Abbey Bike Tools Crombie, with its integrated handle, has long been my go-to for cassette and brake rotor lockrings. However, most people use socket-based tools with an adjustable wrench or 24 mm spanner for such tasks. This is where dedicated socket-holding handles come in, and Pedro’s has just updated its answer with the new Pro Socket Handle 3.0 (US$50). At 270 mm in length and 192 g, it’s compact enough for a toolbox while giving a good hold for stuck things. There are magnets for retaining steel sockets, and an optional grub screw if you want to secure the socket in place properly. 

The Pedros' Pro Socket Handle sits between a long 24 mm spanner and an Abbey Crombie dual-sided wrench.
The Pedro’s Pro Socket Handle is slightly longer than an Abbey Crombie. It also provides a comfortable handle.
The Pedro's Pro Socket handle alongside the matching cassette socket.
Magnets and an optional grub-screw hold the socket.

In my testing, the magnets feel a little weak and so I quickly employed that grub screw to ensure carefree usage and eliminate any play in the socket interface. Where used with Pedros’ Pro Cassette Lockring Tool (a cool tool!), the spline-to-handle distance is almost an exact match to an Abbey dual-sided tool, which helps to prevent cam-out from leveraging the tool off-axis. File this one in the nice-to-have but not must-have category. 

Also new from Pedro’s is the T-Handle bit drive (US$26). The sliding handle design is aimed to speed up usage in tight spots, while at just 80 grams it’s light enough to carry. Stored inside the handle are four bits in common sizes. It’s a fun everyday-carry type tool, but it’s not super-practical as an emergency tool, namely because you’ll probably need to pour out all the bits in order to get the needed size. The lack of extended bits or extension may be a barrier too, for example, the tool won’t reach the shrouded 5 mm bolt of many rear derailleurs. 

The Pedro's T-handle bit drive in a hand.
Sized to be a ride-friendly multi-tool.
The Pedro's T-Handle bit drive, pulled apart on a silver bench.
However, the selection of tool sizes may be a little limiting for most.

Monolith

An assortment of premium spoke wrenches with the new Monolith tools at the front.
The Monolith spoke wrenches sit at the front. The XL version is on the left, with the regular on the right.

And lucky last are some truly unique spoke wrenches. Monolith is a new name to the wheel building tool world and has been quick to make a splash with the humble spoke wrench. 

The ergonomic tri-lobe design is 3D-printed and matched to a steel tool interface. The tolerances and fit are impressively good, with the 3.23 size proving to be the ideal Goldilocks on a DT Swiss nipple: not so snug you’re fighting it but not so loose you’re marring the surface (or worse). Better yet, it works perfectly with my preferred DT Swiss bladed spoke holders (which hold the spoke nearest to the nipple to ensure against wind-up). 

Two sizes of Monolith spoke tool sitting flat on a bench. One is orange and 3.3 mm in size, the other is green and 3.23 mm in size.
Multiple sizes are offered. The design offers four-sided engagement with the nipple.
The Monolith spoke wrench display with the DT Swiss bladed spoke holder within it.
Designed to work with DT Swiss bladed spoke holders.

Monolith offer its spoke wrenches in a variety of common sizes, and with either the quick spinner on top (XL version) or without (regular). These tools are priced at US$30 each. I’ve only had my hands on them for a few days and so it’s certainly far too early to talk durability, but early impressions are good! 

How this exists

That’s a wrap on this edition of Threaded. If you haven’t already subscribed to receive Threaded in your email inbox, then you can do so for free here

As a reminder, Threaded is wholly funded through subscriptions and memberships to Escape Collective. A huge thanks to the many of you who make this possible! If you haven’t already, please consider supporting my work (and that of my colleagues) by joining (special rates exist for full-time mechanics, see our FAQ). 

Bonus photos

A few common bicycle tools sit neatly arranged on a towel.
Spot the neat mechanic.

What did you think of this story?