
Torx gets a bad wrap in the cycling world, and that should come as little surprise given we’re talking about the common combination of poor quality and shallow fasteners mixed with often equally crummy tools. So in this second instalment of Threaded, I’ll be offering solutions to avoid the dreaded “oh crap” moment of camming out (or rounding) a shallow Torx fastener.
There is also TorxPlus more (you’ll come to understand this joke shortly).
Torx explained

So how did we get here? Created in the 1960s by USA industrial conglomerate Textron Inc, Torx is a six-point star-shaped pattern that introduced improved tool and fastener head durability in manufacturing assembly (along with providing a tamper-proof shape). In the past few decades, Torx (aka Hexalobular or Star Drive if you’re avoiding the Torx Trademark) has found increasingly widespread use across multiple industries, and when compared with hex, it offers greater surface contact and tool engagement, meaning more torque capacity for a given size fastener head.
In bicycle applications, Torx made its first mainstream appearance in disc brake rotor bolts by meeting the demand for having a low-profile (button head) fastener that could reliably handle a suitable torque. Since then, almost all major cycling component brands have used Torx in places of shallower and/or lighter aluminium or titanium fasteners.

Unfortunately, such shallow designs only allow for minimal depth insertion of the tool. Meanwhile, those lighter materials are often softer, too. Add in wishy-washy tolerances, and you have an easy do-it-yourself recipe for ruined fastener heads.
Better technique
If you’re stripping Torx heads then the answer is better tools and a change of technique. Or in some cases (looking at you SRAM Flat Mount caliper bolts), a change to deeper bolt heads is my preferred long-term approach. Obviously, I’ll get to the tools, but let’s first talk technique.
It may sound dumb, but it’s important to figure out whether you need a Torx or Hex tool. Some sizes of hex tools will engage with some Torx bolts (some bolts are even designed to work with either tool). A flashlight can be a useful diagnostic tool for identifying subtle shape differences.

If you’ve identified it’s a star drive, you then need to work out the size. Unlike hex, Torx is surprisingly easy to mess up in this regard. A T10 driver will get a T15 fastener moving, and likewise for a T25 tool in a rarer T27 fastener (stripped an XTR M9000 chainring bolt? Yeah ... those were T27). If you’re unsure, try multiple sizes and pick the one with the tightest fit.
With any shallow or easily rounded fastener you want to ensure the inside cavity of the fastener is clean of debris. Anything that prevents the tool from sitting squarely will be problematic.
Finally, how you apply the torque matters a whole lot. You want a perpendicular path between the fastener head and your torque application. Similarly, you want to apply pressure into the fastener as you turn it - this is the same technique as using a Philips screwdriver and it’ll help prevent the tool from camming out due to out-of-plane torque.
The tighter or shallower a fastener, the more this all matters. To an experienced mechanic all of this is second nature, but it requires ongoing thought for the occasional tinkerer.
Use quality tools
The skins of my “buy better-quality tools” drum are pretty tattered by this point, but this approach holds wholly true for Torx. Cheap Torx tools consistently seem to cause more ruined bolts (and days) than great tools.
I did some rudimentary torque output testing between a generic mid-range “S2” Torx T25 bit and a PB Swiss TX25 bit. Using new T25 rotor bolts from the same batch, the generic bit twisted off and ruined the bolt at 8.8 Nm, while the PB Swiss beat my rudimentary test (by stripping the fixture threads) at 14.9 Nm.
While lesser Torx tools will wear or break more readily, they’re also typically less precise-fitting, something easily felt as angular and rotational movement between the tool and the fastener. Here, I measured that a USA-made Bondhus L-shaped T25 key could pivot within the fastener by 10°, while a PB Swiss L-shaped T25 tool had a maximum angular wiggle of 6°. More angular movement means a looser fit and a tool that’s more likely to cam-off, while less movement means better engagement. Neither of these are extreme examples either, with a USAG T-handle proving to have the most angular movement (more than 15°) of those tested, and a Wera Stainless L-key the least (less than 4°). You can see these in action on my Instagram.

To cut to the chase, I’ve had consistently great experiences with Torx tools from Wera, PB Swiss, and Wiha. Other brands can be far more hit-and-miss. For example, the Taiwanese-made T-handles from Park Tool offer a decent fitment, but the company’s P-handles and sockets typically don’t. Snap-On’s bit sockets are wonderful, but some of its other Torx tools have had disappointing sizing. And between the Japanese socket kings, Koken’s Torx bit sockets are typically great, while Nepros’ even fancier-looking Torx sockets tend to fit more loosely.
Just like hex tools, the smaller the fastener size, the more critical a good fitment becomes. You can typically get away with a looser-fitting tool in a T30 chainring bolt, but not so much for a shallow T25 fastener. Regardless of size, I strongly suggest skipping ball-ended Torx tools for bicycle applications.
To complicate matters further, you have some component brands purposefully solving for the common use of crummy tools by undersizing fasteners. Zipp notoriously does this with its stem bolts, and as a result, my preferred PB Swiss T25 bit is too big while the tapered splines on Wera's HF (Holding Function) tools stop full-depth insertion. Thankfully this issue is relatively rare.
If your eyes are glazing over then you probably don’t work with Torx on a daily basis. If that’s you, then it’s worth knowing that for bicycle applications, sizes ranging from T6 to T40 are used by relatively big brands, while sizes T8, T10, T15, T20, T25, and T30 are the most commonly found in cycling. If you just want one set to cover most potential Torx needs on a bicycle, I’d suggest buying an L-shaped set from Wera (#967/9) or Wiha (#36698).
Unfortunately, my holy grail would either be a set of PB Swiss that spans from T6-T30, or a standard Wera set without either a ball-end or the Holding Function (HF) – neither of which currently exist. One day...

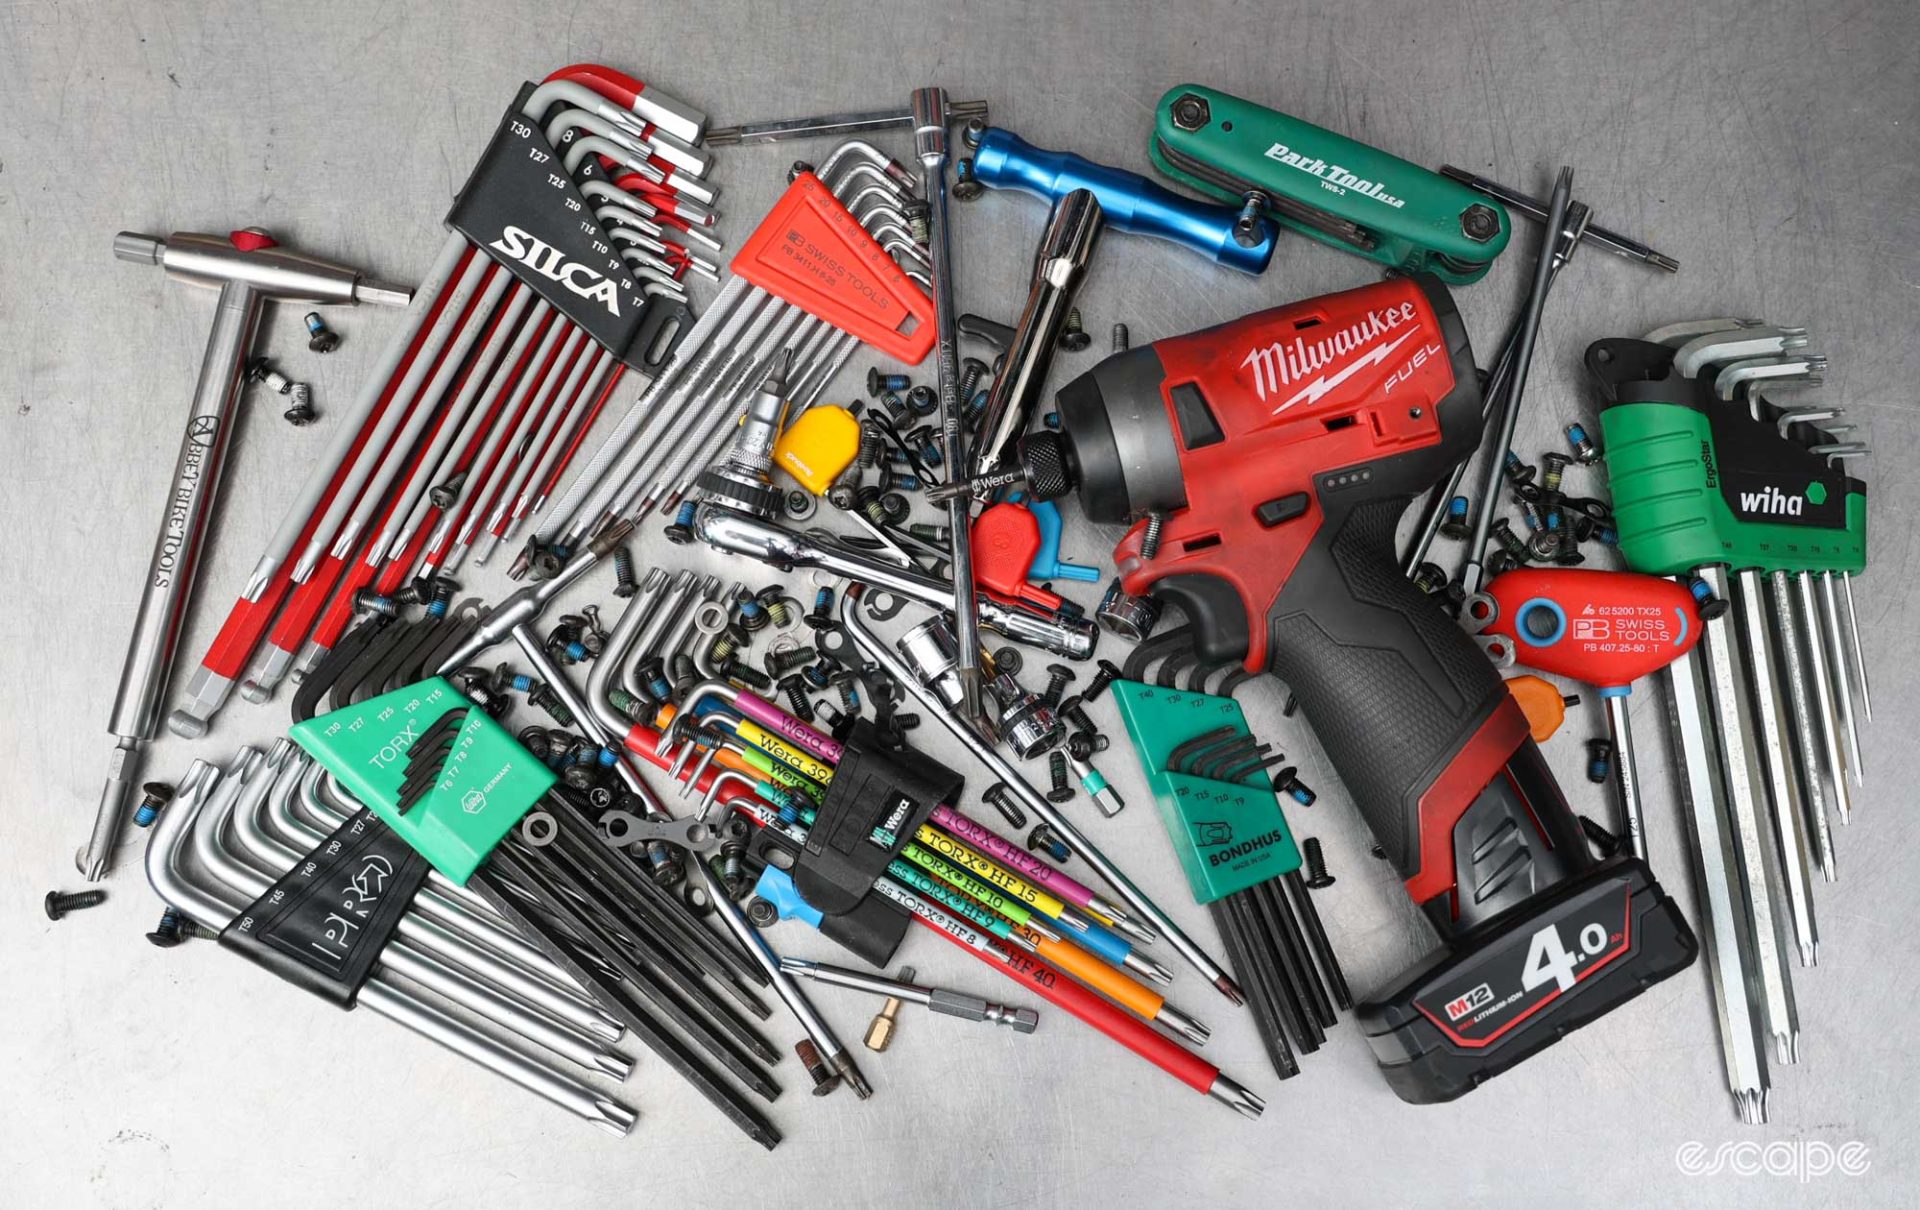
What I use
Did we do a good job with this story?