
It’s no secret that being able to make things allows one to view problems differently. I dream of a workshop filled with an array of machine tools to produce production-quality components in whatever shape my mind can conjure. My only limitations are space, skill, and money.
As a result, 3D printing has been my window into the world of making things. Taking up less room on my desk than an A4 printer/scanner, my filament-plastic-fed 3D printer has provided me with genuinely useful answers to common problems and has me seeing one-off solutions to rare problems . Using the 3D printer hasn’t become a daily part of my life, but using things it produces certainly has.
And so in this edition of Threaded, I’ll share my (relatively short) journey into 3D printing, some lessons learned, and where I get the most value from it. One for the tinkerers and tool nerds, this article has something for the 3D-print curious and hopefully for those who have been turning CAD models into physical items for years.
3D printing 101
The world of 3D printing has gone through some rapid change over the past decade. Today, the 3D banner extends to creating 3D objects in all sorts of materials, including composite wood, ceramics, chocolate (yep), plastics, thermoplastic carbon fibre, and even space-age metals (technically less printing and more sintering). For the sake of this article, I’m going to focus on the printers most commonly found in the garages of enthusiasts capable of building objects from various forms of plastic.

There are two common forms of price-friendly printers for plastics or similar polymers: FDM and SLA. By far the more common pick, fused deposition modelling (FDM) printers work with a spool of plastic filament drawn into the printer’s heated head. It’s best thought of as a computer-controlled hot glue gun. It prints a 2D picture, moves the hot glue gun nozzle by a hair in height, and then prints another picture. Layer by layer 3D printers work to build the final object – and if the design is good, then it’ll be a useful one, too.
Alternatively, there are stereolithography (SLA) printers, otherwise known as resin printers. These use a liquid resin that is hardened through a light source, with the outcome typically being higher-resolution objects. Typically these offer a smaller print area and as such are best kept for smaller printed objects.
Buying a printer can be daunting, and I certainly suffered from choice paralysis when researching for mine. Printers can be bought for under US$200 for something like a Creality Ender-3, and the sky is the limit from there. Those cheap ones can be tuned and tweaked to produce some great printed objects, but they have a reputation for being a little more finicky in producing reliable prints.

By contrast, Escape Collective member Chris Heerschap (my 3D-printing mentor and a name you'll see a lot in this article) talked me into spending more for a Prusa Mini+, the base-level printer from one of the leading names in 3D printing. The justification was that spending more for such a printer would allow the printing itself to be a hobby, rather than the printer itself. Working with the printer, instead of on it, if you will.
Today there are certainly more choices than just Prusa. One hugely popular option is Bambu Labs, which has built a similar plug-and-play reputation for itself. Sovol and Flashforge are two other names that regularly get rave reviews, and there are others once you start considering more specific features.
In picking a printer the main consideration is often print bed size; as in, how big an object can you print. Bigger printers open opportunities, but they’ll also cost more and take up more space. My Prusa Mini+ is super cute and compact, but there have been multiple occurrences of me wanting to print something bigger than the 180 x 180 x 180 mm build volume allows.
Other factors would be material capabilities; as in, what materials can the printer handle. Some materials, such as PLA, will work on just about any FDM printer, but other materials, such as carbon fibre-infused nylon, can require far higher heat, an enclosed printer to control that heat, and perhaps some other specific features that can rule out several options.
Learning curve
Getting started with a printer is typically a little more than plug-and-play, but not a significant technical lift. Some more premium printers will arrive near fully assembled and can be ultra quick to start using, while many cheaper choices are typically shipped partially assembled and it’s expected that you’ll need an hour or two before you’re ready to print.
With the printer running it’s normal to do a couple of test prints to check the settings and alignments. Many printers on the market have come a long way with making these steps increasingly seamless, and it’s far more automated than ever. There are countless guides on websites and YouTube for how to do these steps for the printer you choose. While it hasn’t always been smooth sailing, I’d say my Prusa has caused vastly less frustration than my HP A4 paper printer of a similar age (seriously, how are there still crummy paper printers on the market?)
OK, so now you’re whirring. It’s time to think about whether you’d like to print an existing file or create your own. My favourite source for free file downloads is printables.com (a community run by Prusa). It’s a cleaner and better-managed option versus the older Thingiverse and Yeggi platforms (which given their age, do typically have a deeper archive of printable files).

Meanwhile, some makers will sell you the 3D print files of their own creations. This isn’t a hugely common business model in cycling, but you will stumble across it. Often the files are cheap, and if they’re being sold, they’re typically well-designed for easy printing. Of course many of these makers offer you the chance to buy pre-printed versions of their designs, too.
And then we come to creating your own designs for printing. This begins with a CAD (computer-aided design) program in order to create a 3D shape. I got my start with a kids' version of AutoDesk CAD, called TinkerCAD which I’ve found to be effective at creating basic shapes such as bearing drifts and storage containers. For those looking to go more advanced, AutoDesk Fusion360 is a great option, and they offer free licences for those designing without a commercial purpose.
With a design file in hand, you use a piece of (typically free) software called a slicer, which effectively reformats the design into a layer-by-layer directory for the printer to follow. Most printers will have recommended slicers to use, and some, such as Prusa, will suggest their own. Some of these slicers are also getting relatively advanced and allow you to chop-and-change existing designs, add prompts to change out colours, or even pause printing for you to place things like magnets or metal-threaded nuts straight into the print.
Whatever you choose to print, the common recommendation is to begin with PLA as a material for its ease and stability in printing. It’s surprisingly strong stuff when printed correctly, although it’s known to degrade under consistent sunlight and/or heat exposure.

Another popular material is PETG, which adds improved strength, abrasion resistance, heat resistance, and a touch of ductility when compared to PLA. It is hard to print with compared to PLA, but still considered easy in the grand scheme of material options.
Following these materials, you’ll likely be looking at more specialist options. Chopped carbon fibre-infused nylon is an increasingly popular option for creating load-bearing components, such as the pedal bodies that an ex-colleague Brian Park has successfully created. Those needing something flexible and bordering on rubber should look to TPU. And then there’s the real interesting stuff, such as filament from IGUS for printing your own functioning bushings (it’s technically designed for prototype/fitment testing, but I won’t tell if you don’t).
Regardless of your material, you’ll probably find yourself learning through trial and error. One such lesson for me has been just how much the orientation of the print matters to how it’ll handle loads. Considering that a print builds layers vertically, you may need to flip the print orientation of a part in order to retain the strength of extruded material. A good example of this would be when you're printing a tyre lever. You want the strength along the length of the tool, rather than in across its width, so for this, you’d get best results by printing the lever on its side.

You'll likely also learn the limitations of what can be printed in plastic versus what should just be bought. You'll quickly stumble across printable versions of tools such as Shimano cassette lockring sockets, various types of spanners, and even hammers. Some of these may work, but experience tells me many of these prints will quickly fail when stressed. The good news is that such learning opportunities come at a low expense (although the plastic waste is a factor to consider).
I also learned a lesson about adhesion with prints not sticking to the print bed. For me, this was largely solved by lowering the extruder height (Z-height) in relation to the print bed so that the print was better squished into place (another feature that’s automated on newer and more premium printers).
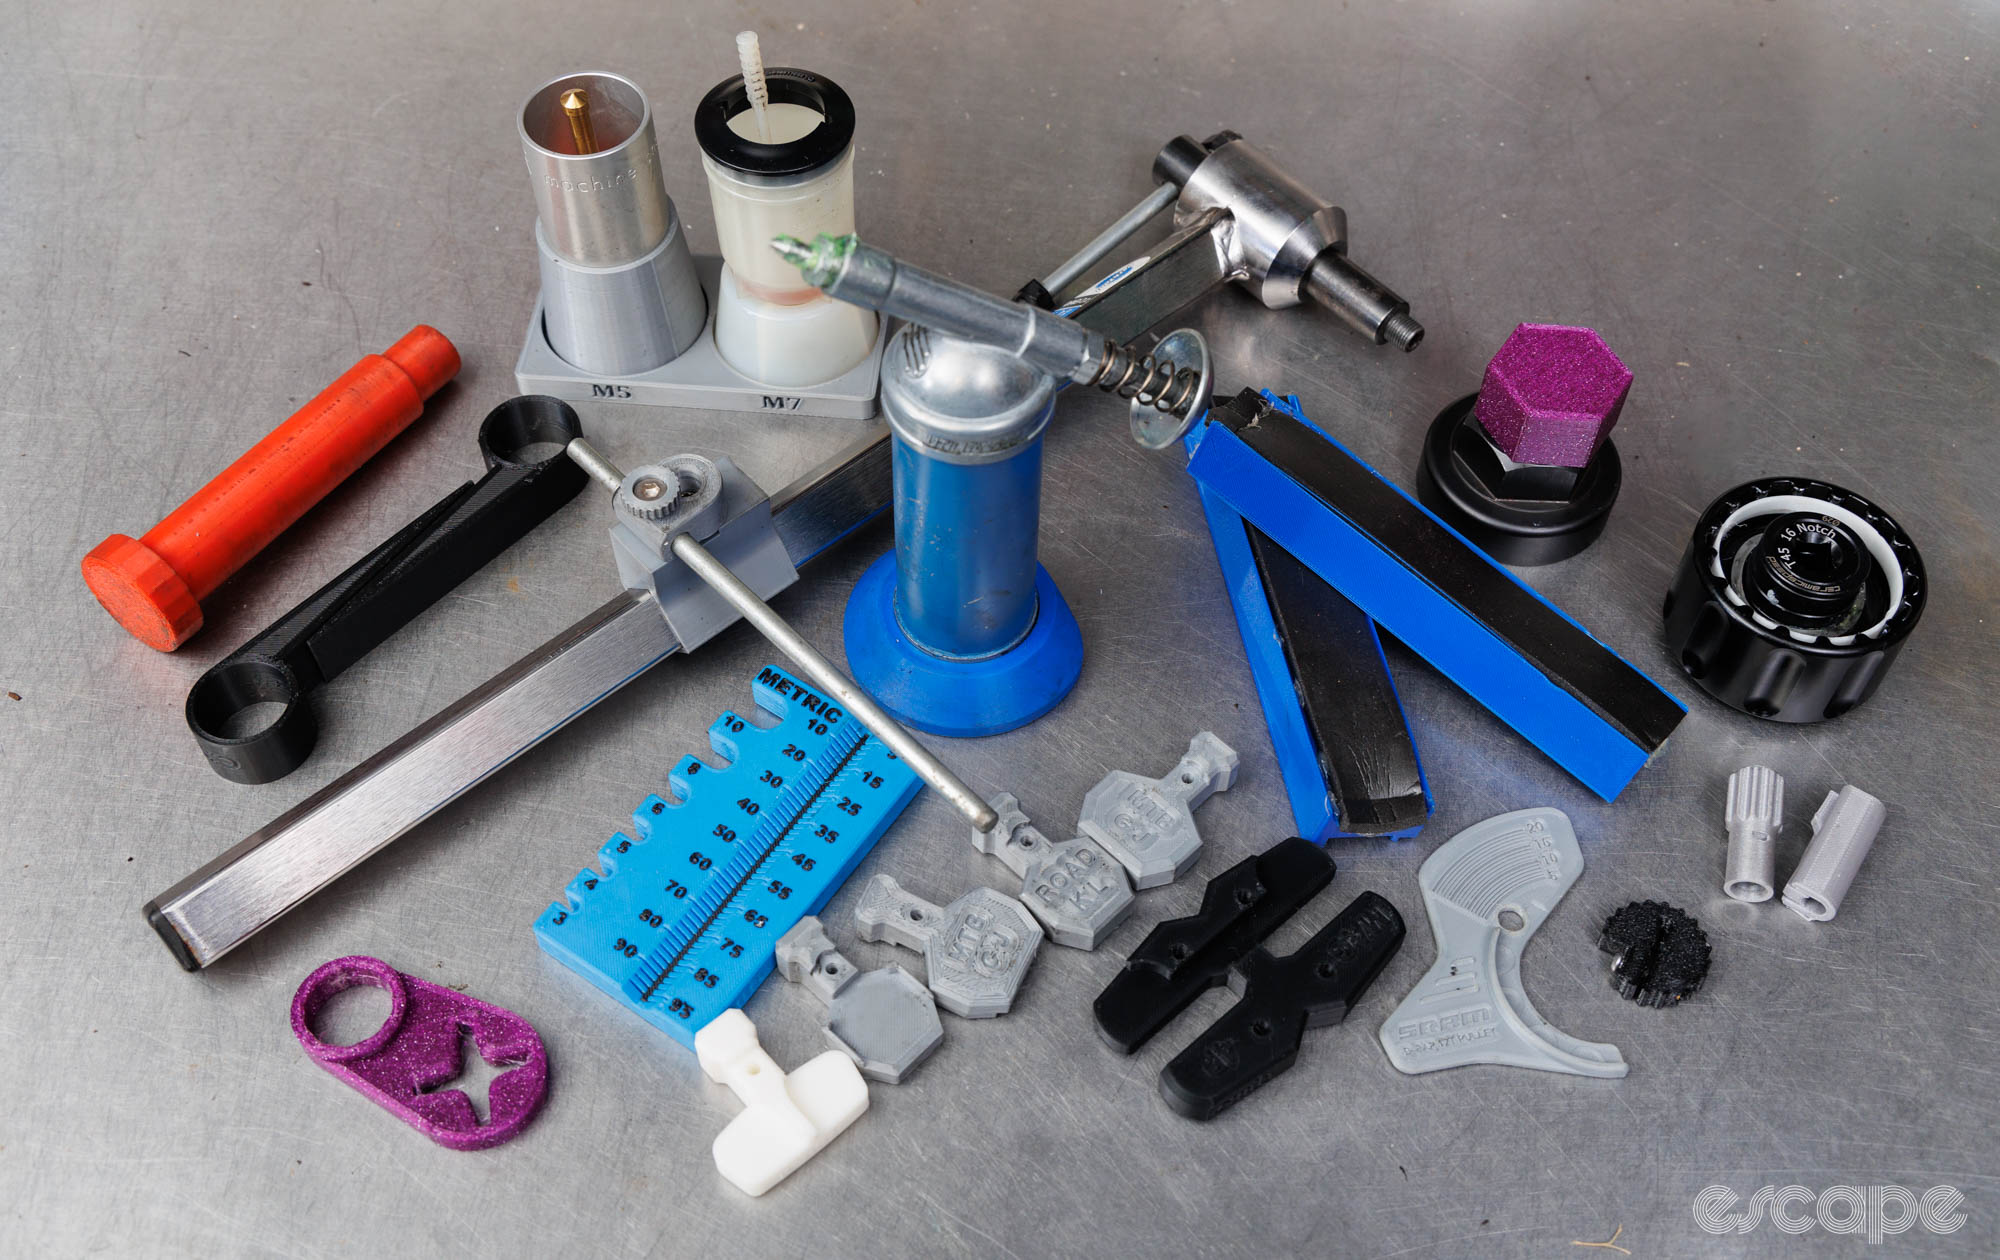
Some of my favourite prints for fixing bikes
OK, time to share some specifics of printed objects that I use regularly. Being Threaded, I’ll focus on prints that sit at the workshop/tool end of things, rather than household and riding-related items. Many of these are designed by others (predominately Chris Heerschap), while a handful are my own crude creations.
Did we do a good job with this story?