Riding is Life
Lights

Comments

Threaded #12: the woes of T47 bottom brackets  

Tools and techniques for dealing with thin-flange bottom brackets 

Dave Rome
by Dave Rome 28.03.2024 Photography by
Dave Rome
More from Dave +

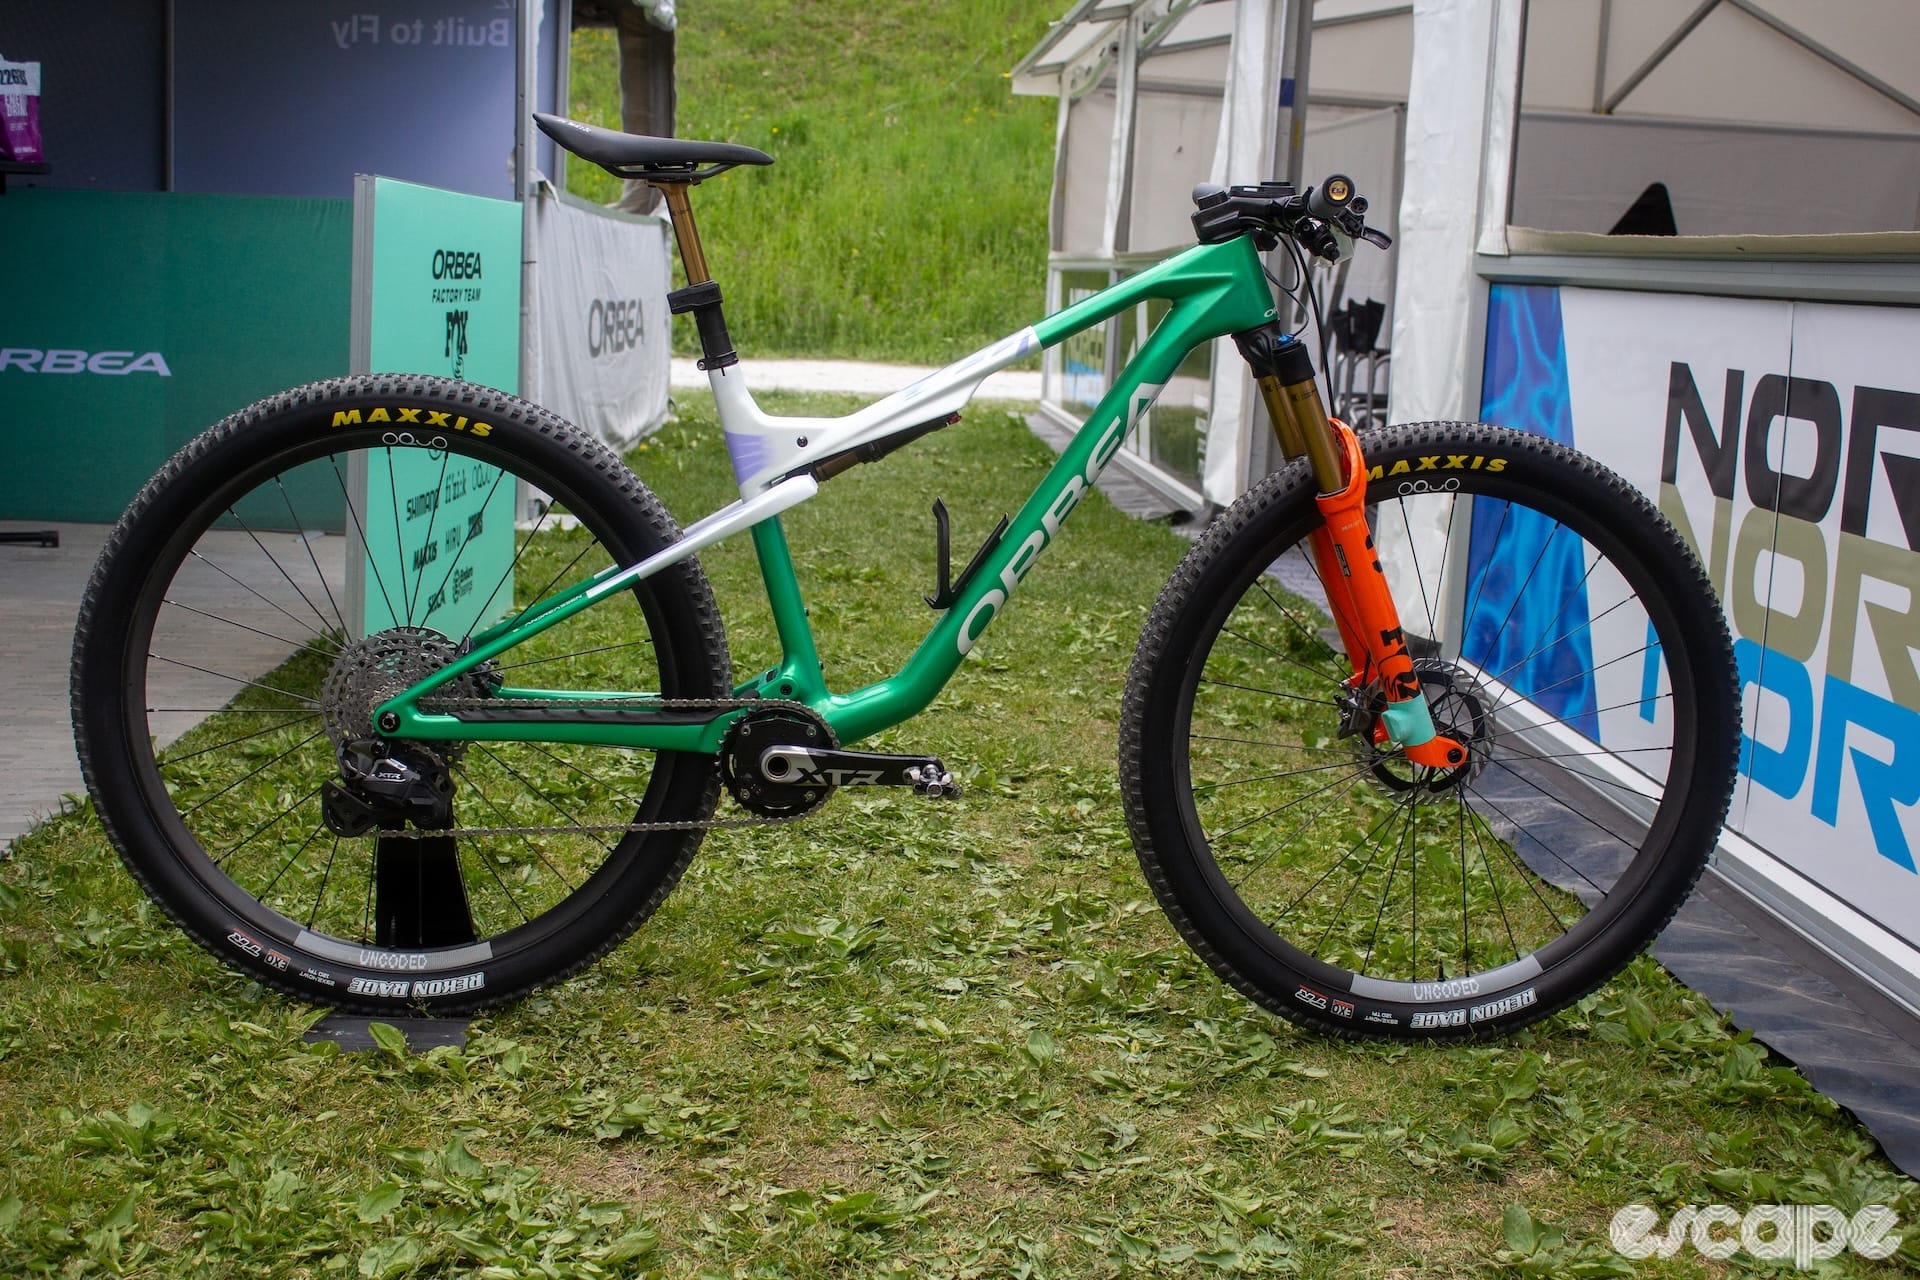
The days of owning one or two bottom bracket tools to service the vast majority of modern bikes are now a distant memory. Press-fit introduced a wave of complexity and tooling to more premium bikes. And just as it looked like things were stabilising, in came the knight of T47 unknowingly on a horse with diarrhoea. 

In 2015, Engin Cycles, White Industries, Argonaut Cycles, and Chris King sought to combine the easy serviceability of a threaded shell, but do it with the size benefits afforded by PF30 and similar 46 mm diameter press-fit shells. The result was T47, a 47x1mm thread that could be cut into existing metal bikes with 46 mm press-fit shells. Since then, the T47 standard has seen widespread uptake in the boutique bike world, along with mainstream brands such Trek, Factor and Felt. 

While T47 sought to unify the previous mess that was bottom brackets, it has only worsened the required tool situation. From its early days, things started to get messy with various tool fitments and bottom bracket types, and nearly a decade later, it’s no cleaner. 

This edition of Threaded is part rant, explainer, and solution provider. For anyone who’s fought with the paper-thin tool splines of a T47 Internal bottom bracket, this one is for you. Also, there’s some useful stuff here for anyone struggling with thin flange centerlock brake lockrings (looking at you, Zipp) or certain thread-together press-fit bottom brackets. 

You may notice a refreshing lack of ads or affiliate links. Like all content at Escape Collective, Threaded is wholly funded through the support of members and subscribers. If you find value in this content please support it.

Who the hell made this mess? 

The intention of T47 may have been great, but it didn’t take long for a lack of communication between manufacturers (largely on the component end) ruined it to the point that the 47 x 1 mm thread of T47 was the only consistent element to be found. It’s a multi-tiered mess, so let me pick through the layers. 

Today there are wide and narrow format T47 bottom brackets. Frames with a shell width of 68 (road and gravel) or 73mm (MTB, and some gravel) are typically intended to have the bearing cups and the bearings external of the frame. The concept here is to replicate that of an English threaded bottom bracket, where the external cups add to the total bearing width that matches the length of a modern crankset spindle (86 mm for road and 92 mm for MTB). This is known as T47 External. 

Then there are wide format T47 bottom bracket shells, where the bottom bracket bearing sits within the frame shell. Generally based on frame shell widths of 86.5 mm (road and gravel), 89.5 mm, or 92 mm (MTB), this is known as T47 Internal. Visually this is most similar to a press-fit system with the flange of the cup barely protruding past the frame. 

T47 Internal (front) versus T47 External (back)
T47 Internal (front) versus T47 External (back). The choice is dictated by the width of the frame’s bottom bracket shell.

To make matters all the more confusing, there are the subtle iterations. Trek made its T47 shell widths 85.5 mm, 1 mm narrower than the usual T47 Internal concept (I’ll return to this). Meanwhile, Factor, Felt, and now Cervelo all have bikes that use an Asymmetric T47 (T47a), effectively a threaded version of Cervelo’s BBRight press-fit design. Here, the left-side cup is of a T47 Internal variant, while the right-side (drive side) cup is a T47 External. It’s funky but arguably hasn’t created wholly new products to fit. 

Colnago’s T45 system, which lasted a mere two generations of road bikes, forced the creation of new products. It may have looked like T47, but at 2 mm smaller in diameter, it wasn’t. Colnago intended this to offer a replaceable (threaded) cup to receive a common BB86 press-fit bottom bracket. Obviously, having a press-fit cup within a threaded cup doubled the opportunity for creaks, and so soon enough, CeramicSpeed offered direct-fit T45 bottom brackets to try solve that pain. Either way, this system suffers many of the same woes as T47 Internal, which I’ll get to. 

Colnago T45 bottom bracket cup resting on a T47 cup.
Colnago T45 cup resting on a T47 cup. They’re close, but not cross-compatible.

Already, things are looking confusing, and that’s before we even consider that there are three common crank spindle diameters (24, 28.99, and 30 mm), with a few weird ones on top of that. Sheesh! 

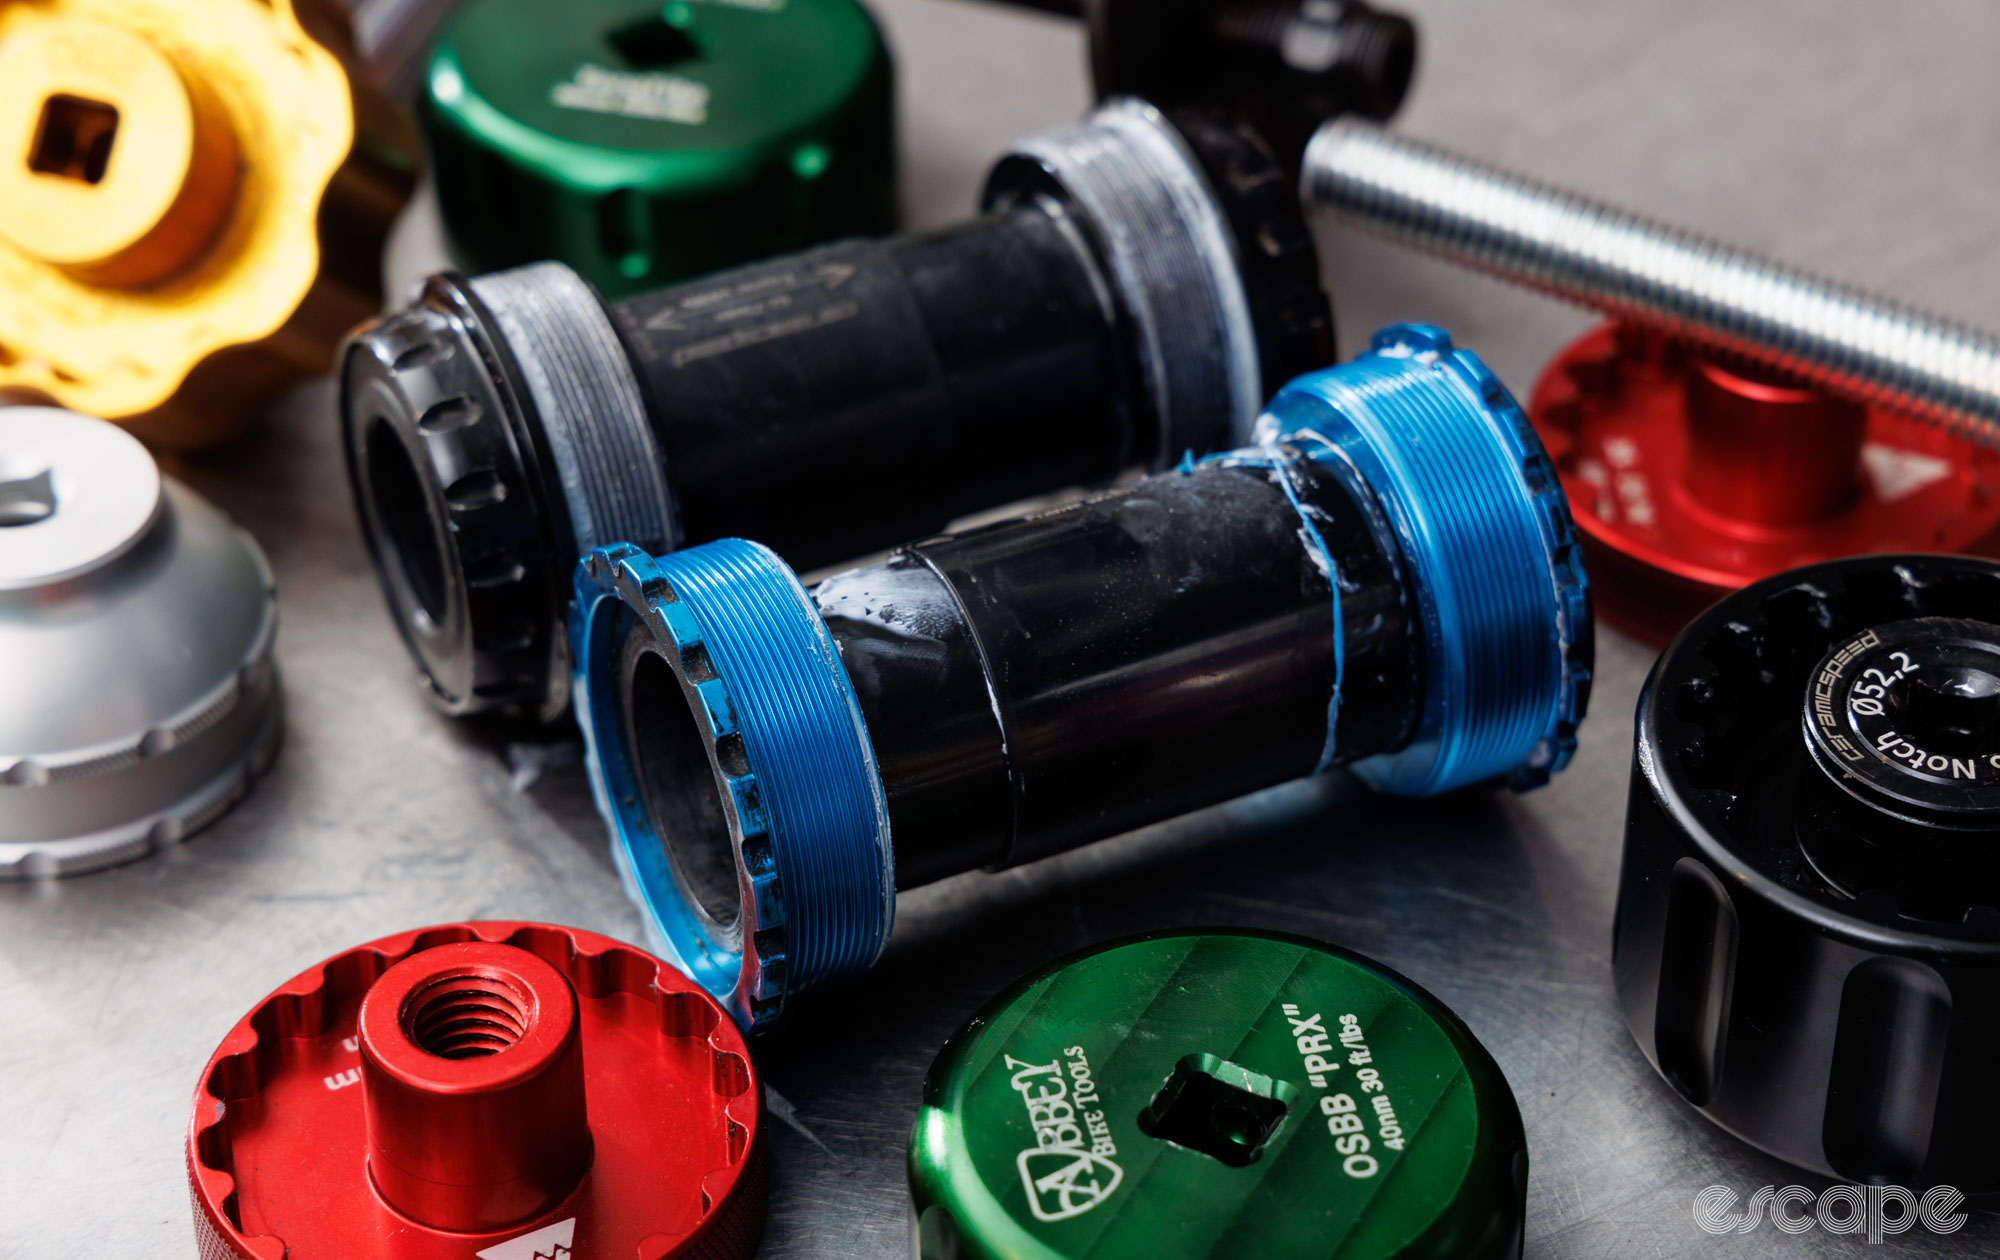
If you’ve got your head around the number of variations in fitting a crank to a frame, allow me to introduce the biggest clusterf*ck of them all—tool fitment variations. That’s right, there’s no agreed-upon tool spline for T47, and by my count, there are approximately eight tool spline fitments that may be applicable. 

A drawer full of bottom bracket tools 

Knowing which bottom bracket tool you need for T47 can be like seeking water with a divining rod. As overall diameter restrictions change, most bottom bracket makers will change the required tool between T47 External and T47 Internal options, with crank spindle diameter often playing a role, too. 

A toolbox drawer full of various bottom bracket sockets from numerous brands.
There are many overlapping and replicated tools in this drawer, still, a busy workshop working on a wide variety of modern bikes would need at least 12 of these.

For example, T47 External bottom brackets typically offer a smaller diameter cup to fit a tool over and will therefore often use more widespread tooling. As a result, T47 External bottom brackets for use with Shimano 24 mm spindles often use the regular old 46.2 mm diameter and 16-notch tool, the same one you probably already own for use with many centerlock rotor lockrings, lower-end (or older) Shimano bottom brackets, and countless other external-type bottom brackets. Even where the crank spindle is a larger 28.99 or 30 mm in diameter, T47 External may use a size of tool shared with BSA30, DUB, or similar bottom brackets.  

The brand on the bottom bracket will often help to identify the tool you need, but I wouldn’t rely solely on it. For example, SRAM DUB T47 Internal bottom brackets use a different tool to the company’s T47 External bottom brackets. And given that you’ll find other brands doing similarly unexpected things, my suggestion is to measure what you’ve got.

To measure a bottom bracket cup for the appropriate tool you merely need a machinists ruler or a set of calipers. You’ll need to measure the outer diameter of the external cup (the outer edges of the tool spline/notches), the minor diameter at the base of two opposing tool spline notches, and the number of spline notches (typically 12 or 16). 

Measuring the outer diameter of the tool spline/flange with digital calipers.
Measuring the outer diameter of the tool spline/flange.
Measuring the diameter between two opposing tool notches with digital calipers.
Measuring the diameter between two opposing tool notches.

Then it’s time to go shopping. Abbey Bike Tools is often my first point of call for such bottom bracket tools as they have the widest selection and a useful sizing chart to match. Yes, they’re often one of the pricier options, but the quality of fitment is second-to-none which helps to keep the tool in place all while preventing marring of the bottom bracket cups. 

Bottom bracket compatibility chart from Abbey Bike Tools.
Abbey Bike Tool’s bottom bracket size chart is a useful resource in figuring out the tool you need. Details on how to measure above. In this chart, “A” references the outside (aka major) diameter of the cup, whereas “B” refers to the more important minor diameter between two opposing notches.

Another great option is WCM (sold by DIY-MTB in Australia). This is likely a new name to many as the brand has kept rather under the radar by predominantly selling on eBay. They, too, offer a wide range of fitment options, in both socket or spanner-type tools (I’ll get to this later), and at great prices. The tools look unfinished, but the quality is trustworthy. 

After that, there are the usual suspects, including Wheels Manufacturing (there’s lots to like in these), Park Tool, Unior, WolfTooth, and Cyclus, although there are a few gaps in the ranges of each of these brands. You’ll also often find good tools offered by the makers of the bottom brackets, such as Enduro, CeramicSpeed, Chris King, Hope, and so on. And like many things, you’ll find low-cost options on AliExpress with varying levels of success. 

When shopping, try avoid tools that claim to cover a variance in minor diameter sizing. “If a tool fits multiple sizes of bottom bracket, then that’s asking for trouble,” said Jason Quade, founder of Abbey Bike Tools. The exception to this is tools that are double-sided to give you two tool sizes in one, which is great until it isn’t… 

A selection of Abbey Bike Tools sockets on a bench.
Some of these tools come close to each other in sizing, but they’re different.

(Edit: Some brands, such as Park Tool, purposefully offer tools with a more generous outside diameter so to increase compatibility between bottom brackets with equal notch counts and similar minor diameters. According to Park Tool, the minor (notch) diameter is the working tool interface, while the major diameter doesn’t play a critical role.

While true, my experience has been that precisely matching the minor diameter and closing the gap of the outer diameter helps to produce a tighter fit that is likely to cam-off – more on this next.)

The woes of thin cup flanges 

Okay, so I don’t have much of an axe to grind with T47 External. Of course, the possibility of needing up to eight different types of similar-looking splined tool when three should suffice is frustrating, but that cat is now well up the tree. Rather, my true frustration sits with T47 Internal and its thin cup flanges. 

T47 External cup (left), T47 Internal cup (right).
T47 External (left) is simple to work with. Rather, my frustrations sit with the thin tooled flanges of T47 Internal (right).

Consider the restricted space for a bottom bracket to sit. Frame designers are trying to maximise frame width for stiffness and tyre clearance, while component manufacturers are trying to reduce crank stance width (Q-Factor) and chainline. Press-fit afforded some benefits here and saved room by not needing a tool spline. And that brings us to T47 Internal, a system that retains some of the supposed width benefits of a press-fit bottom bracket, but adds a tool spline to a place that arguably lacks the material width for it. 

In some cases, these splines are just 2 mm thick (yep, just 0.08in for those who measure by the Freedoms). As many will have experienced in working with shallow bolts, such limited material can make it difficult to install or remove without the tool slipping off of it. Consider that many T47 bottom brackets call for 30-50Nm, and you have a high torque demand with little tool engagement to do it! 

In trying to solve for this, Trek took its own path by narrowing the shells of its T47 frames by 1 mm to make the tool interface at the bottom bracket cup .5 mm wider for easier bike assembly – arguably not enough to make a meaningful difference but a decent percentage increase over 2 mm. Meanwhile, several bottom bracket manufacturers have attempted to make the tool interface as wide as possible by having no material beyond the spline, but this only introduces risk of damaging the painted frame you’re threading against.

Colnago T45 cup on the left showing a spline without a backing plate. CeramicSpeed T47 Internal cup on the right, showing a bottom bracket cup with a backing plate.
Backed versus unbacked cups. The cup on the left offers deeper tool engagement, but the tool can slip past the cup and contact the frame. Meanwhile, the cup on the right has a thin amount of material to stop the tool spline from contacting the frame (commonly painted in this area).

Solutions for thin flanges

Okay, time for some solutions. First and foremost, starting with a tool that offers good tolerances and a well-tolerated fit to the bottom bracket splines goes a long way. This is where quality tools from the likes of Abbey Bike Tools, Enduro, Wheels Mfg, WCM, Wolf Tooth, CeramicSpeed, Chris King, and a handful of others that often sit on the more premium price end offer an advantage. 

Next, it’s important to consider the effect of cam-off. “When the axis of rotation is not the same as the axis of the thread, the tool will start to roll off the bottom bracket,” explained Quade. This is a hard one to explain, but you can witness this first-hand by placing a socket extension between your drive tool and the socket, the outcome will be a socket noticeably more susceptible to twisting off. To counter the physics here, the best socket tools for thin-flange bottom brackets will be shallow in height to allow a more inline axis of force. This is why I feel dual-sided sockets and the taller stack they introduce aren’t the best answer (and more reason why I think the 8-in-1 socket tools on AliExpress are silly). 

Better than a shallow socket is a spanner-type bottom bracket tool, which offers a perfectly perpendicular application of force to the bottom bracket flange. However, such spanner tools can be limited in available leverage (length) and sometimes have clearance issues with wide-set chainstays. Sadly, there’s no free lunch here. 

A CeramicSpeed socket can be tilted off the bottom bracket spline.
This socket is still engaged with the tool spline at the lower edge of the bottom bracket. Adding a lever to turn this socket will cause this tilting (cam-off) action on the tool interface.
A Wolf Tooth pack wrench on a Zipp centerlock rotor lockring.
By contrast, a wrench-style tool allows you to apply force in the same axis as the spline interface. Of course this picture isn’t showing a bottom bracket, but the same principle applies with thin flange centerlock lockrings.

Back to socket tools. With a snug-fitting and ideally shallow-depth tool, there are further steps to prevent cam-off issues. The most basic is simply pushing the socket/spanner in towards the frame while applying the load – a good technique to use, but not a guarantee for success. That brings me to two paths for secure tool retention. 

The first path uses a tool with a locating bore that sits within the bottom bracket bearing to help keep the tool square. CeramicSpeed and Enduro both offer good examples of this, with the former featuring a clever removable magnetic sleeve that allows you to adapt the socket for use within 24, 28, 29, and 30 mm bearing sizes. This method is better than nothing, but I still find the sockets can tilt off-axis under high torque, and for that reason, I’m all about the second path. 

CeramicSpeed, Enduro, and Park Tool bottom bracket tools on a bench.
The cylinders in the centre of the black (CeramicSpeed) and gold (Enduro) sockets are sized to match with a specific bearing diameter and assist with tool stability. They help, but there’s still room for improvement when dealing with a 2-3 mm width aluminium bottom bracket flange.

This second path is a somewhat old-school idea of affixing the tool in place, a technique that mechanics have done since the days of square-tapered bottom brackets. This is most simply done with a spanner-style bottom bracket tool, where you can use any form of threaded rod, hub bearing press, headset press, or even a QuickClamp to lock the spanner onto the bottom bracket flange effectively. 

Things quickly get more complicated (and fancy) when using square-drive type sockets with a ratchet, breaker bar, or torque wrench. In answering this, recent years have seen a wave of new bottom bracket socket tools offering a similar theme – internal threads. 

A Wheels Manufacturing Thin Flange tool kit in use on a mountain bike.
Locked in and zero risk of tool cam-off. This Wheels Manufacturing Thin Flange bottom bracket tool set is made specifically to stop me (and countless others) from ranting.

Created by the likes of Abbey Bike Tools, Wheels Manufacturing, Park Tool, Cyclus, and a few more, these sockets often look like any other square-drive socket, albeit with a centrally placed thread on the spline side. This thread can answer the problem of cam-off by allowing the tool to be locked in place, and each tool brand has a subtly different approach to doing that. 

One of the first to do it, Abbey Bike Tools uses a simple M6 thread that works with its Geisler truing-stand adapter or any length of M6 threaded rod and a stack of spacers bought from a hardware store. Wheels Manufacturing’s Thin Flange bottom bracket sockets offer a 1/2in UNC thread that uses the company’s headset press. And Park Tool’s newer sockets feature a M15 x 1 mm thread that can be DIY’d or matched with the company’s BBT-RS tool retaining system

Whichever method you use, Quade suggests using a heavy gauge spring on the opposing side (as is found on some production socket-holding tools). This will help keep tension on the bottom bracket socket while also allowing you to drive the socket freely. It’s a trick that works incredibly well. 

Admittedly there’s some more expensive tooling involved here, but with the tool locked against the socket, the fears of slipping and causing tool, bottom bracket, or even frame damage are almost entirely resolved. 

One final tip is to put a thin plastic bag between your socket and the bottom bracket flange. Doing this will help to protect the often-delicate bottom bracket flanges and will greatly reduce the chances of you damaging any paint that may be behind it. And if you want to take things up to a wholly obsessive level, then you could 3D print a shim to keep your socket from extending past the splines of the bottom bracket flange… yeah, I may have a problem. 

3D printed plastic shim, CeramicSpeed socket, and a Colnago T45 bottom bracket cup.
The white plastic piece was 3D-printed to shim the tool from going past the bottom bracket cup.
Colnago T45 bottom bracket cup sitting ontop of the 3D printed shim and CeramicSpeed tool
The installed bottom bracket cup was a hair thicker but you get the idea.

Threading it together 

The larger threaded cup of T47 sounded so good in theory, but in practise, the numerous variations of Internal and external cups, plus the division on tool spline sizing has caused some significant issues for professional mechanics and home mechanics alike. 

I still think many press-fit systems are superior to work with – especially when paint sits near to the edge of the bottom bracket flange. Thankfully newer and dedicated thin flange tooling has greatly helped to make T47 Internal systems less sucky to service. 

As is often the case in bicycling mechanics, having the right tools and techniques will result in consistent quality outcomes. 


Coming up 

Threaded will return in 14 days with a theme I hope some of you have sorely missed – New Tools Day! Expect high-res images of a bunch of new cycling and non-cycling tools that I’ve had my hands on recently. I offer a money-back guarantee if you’ve already seen them all. 

Threaded is an ongoing series for tool nerds, DIYers, and professional mechanics. If you haven’t already, you can sign up for free to receive notice of future editions.

What did you think of this story?