Riding is Life
Lights

Comments

Threaded #9: Installing cartridge bearings right

All the tools and techniques for squarely installing those new bearings.

Dave Rome
by Dave Rome 16.02.2024 Photography by
Dave Rome
More from Dave +

Welcome back to Threaded, the tool column for all tool nerds, bicycle mechanics, and DIY enthusiasts. This is the third and final edition of the cartridge bearing (not so) mini-series. 

Part one looked at best practise methods for removing cartridge bearings.  Part two was all about finding the correct size and measuring the various types of cartridge bearings found on bicycles. And now, we’re ready to cover the processes and tools for installing cartridge bearings – lessons that doubly apply to press-fit bottom brackets and headset cups. 

While some of these tasks covered may be best left to professionals, as usual with Threaded, I’ll aim to offer insight relevant to the budgets and experience levels of home mechanics through to professionals. 

Pressing principles 

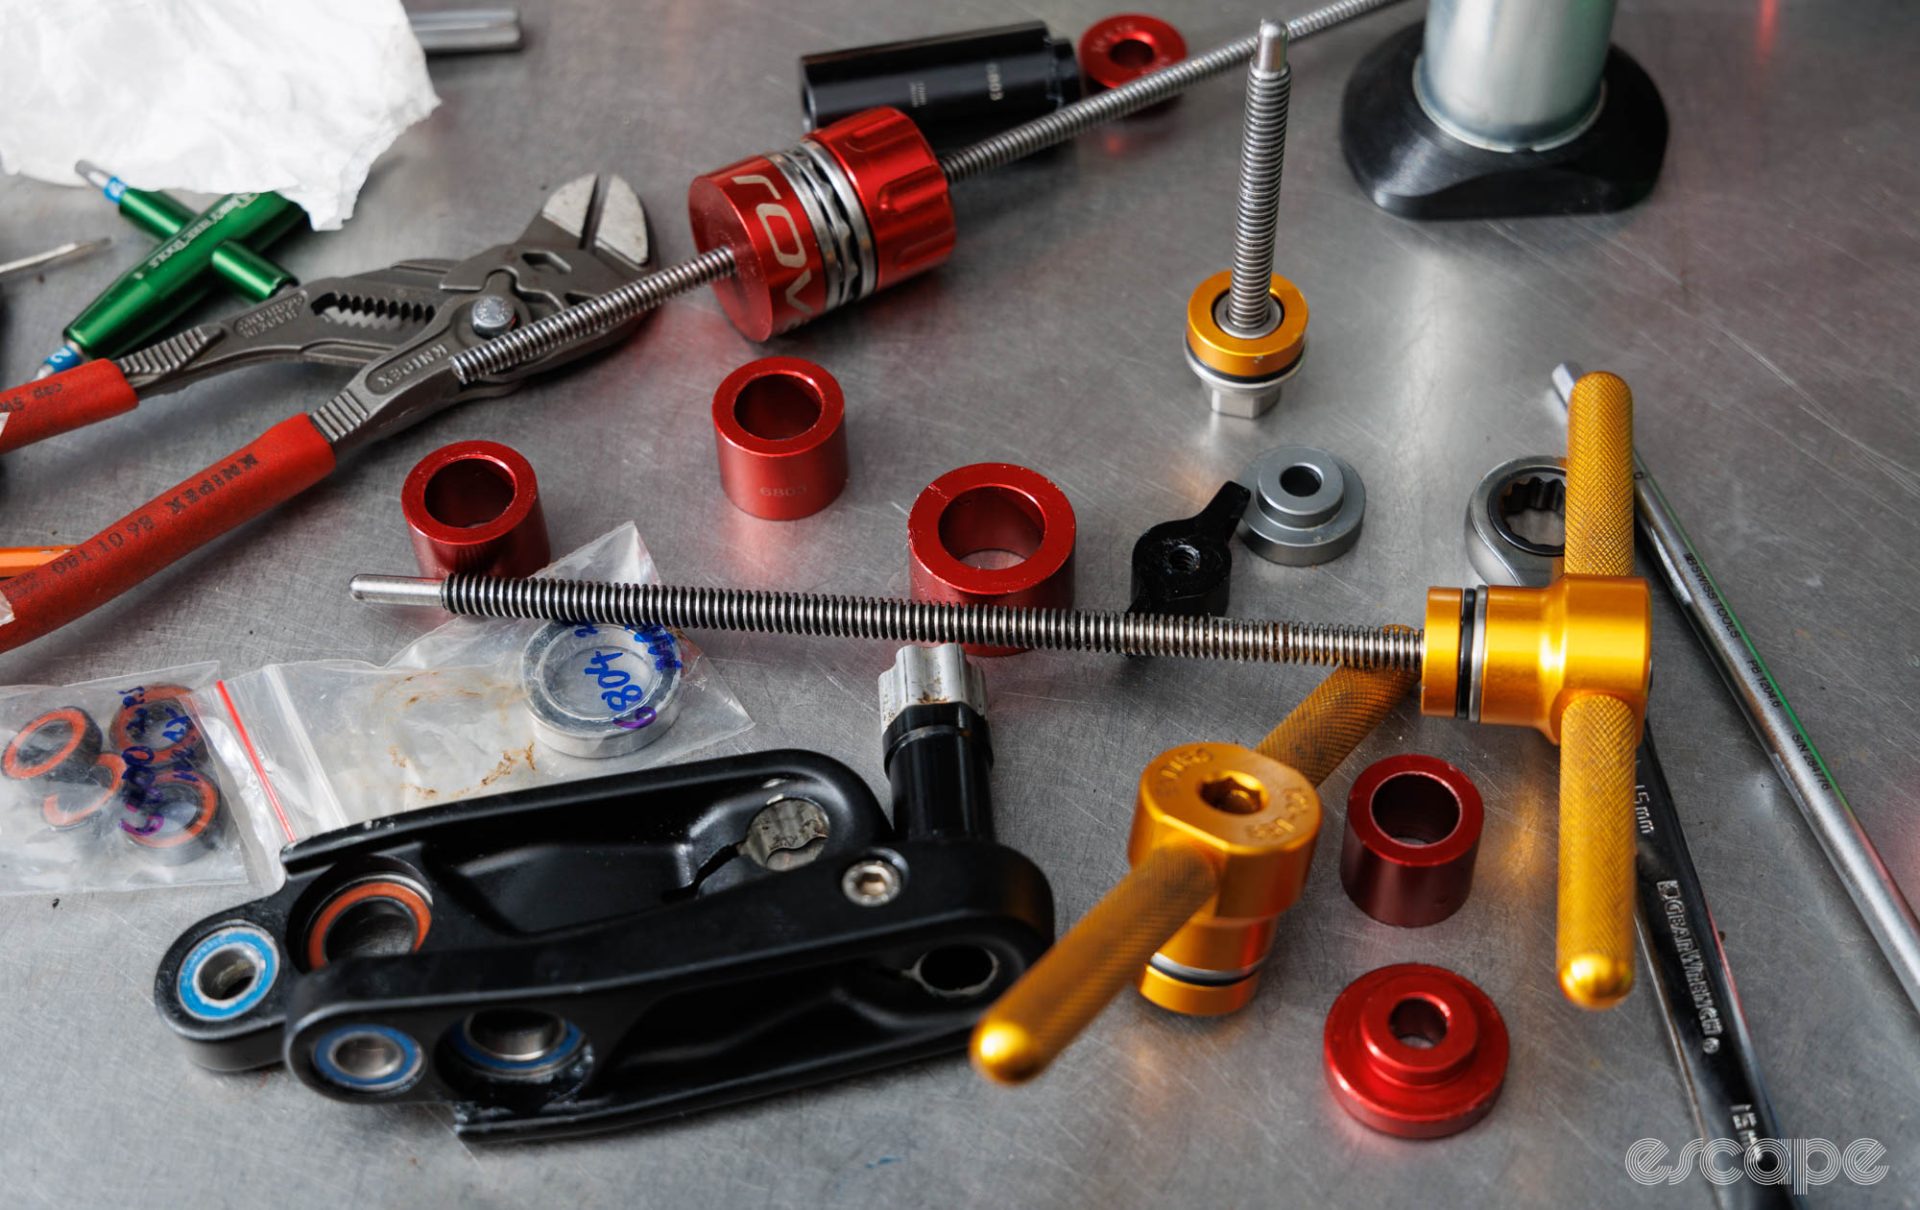
While removing bearings can be a tricky game of ever more specialised tools and creativity, the process of installing a cartridge bearing (or bearing cup) into its bore is often pretty simple and requires relatively affordable tools (even a trip to a hardware store may suffice). 

In a magical world where all the bearing bores are made exact to tolerance and ideally square to each other, the process for installing a bearing into its bore is a relatively simple process. In this world where unicorns roam and housing is affordable, merely keeping the bearing perfectly straight is enough to ensure the bearing stays that way. Add pressing on the bearing from the right spot and you’re golden. 

Pressing from the right spot will be dependent on how the bearing is retained and the axle design around it. Most bicycle components use the outer race of the cartridge bearing as the press-fit interface. Meanwhile, in rare instances, the inner race serves for the press-fit, such as with Campagnolo Ultra Torque cranks. You should always press in a bearing by the race that acts as the press-fit interface. It’s also often perfectly fine to press against both races, assuming that the fixed race is taking the load and the loose race is merely supporting alignment – this is the default method of most tools. Meanwhile, pressing solely on the “loose” race (typically the inner race) can damage the bearing and should be avoided. 

A bearing sits within a bicycle hub shell. The bearing has a red seal.
In most cases, the outer race (silver cylindrical piece shown) is used as the press-fit interface. You want to press the bearing in by this stationary race.

While sometimes unavailable, it’s always a good idea to consult directions from the component manufacturer. If a manufacturer calls for pressing of the bearing in a certain manner, then it’s likely for good reason. For example, some hub designs have an axle that sits proud of the bearing and, therefore, calls for pressing against the outer race with no contact to the inner race. 

When installing a bearing it’s important you don’t force it into place. “It can be easy to strong arm/hand a press-fit interface, but having finesse and an easy hand when pressing can make a world of difference. The little pressure points of resistance are often communicating something,” said Paul Sollenberger, Head of Product Management at CeramicSpeed.

That increase in resistance may be the result of an undersized bore, but more commonly, it’s likely to be a bearing that’s going in crooked and likely damaging the bore in the process. Many higher-end bearings tools no longer provide big handles, and that’s simply because it shouldn’t take much force to install a bearing if it’s going in correctly. 

A diagram showing straight versus crooked installation of a bearing.
There will be a sudden increase in force required if the bearing isn’t going in straight. Image provided by Alt-Alt Bike Products.

“When a bearing isn’t going in square it will gouge material in the bearing bore. Remember, in many applications you are pressing a hardened steel bearing into a soft aluminum or carbon part; it doesn’t take much to damage the part,” explained Jason Quade, founder of Abbey Bike Tools. “This will lead to a poor-fitting bearing that is more prone to creak and will usually reduce durability.” 

Another general rule I always recommend is to press one bearing (or cup) at a time. You have a far greater chance of keeping the bearing square if leveraging against a surface (again in an ideal world) that is solid and perpendicular. Doing one bearing at a time also allows you to more easily focus on that all-important tactile feel for whether the bearing is going in correctly or not. Related, if the bearing press being used has a bushing, a thrust bearing, or a similar low-friction surface, then you want to press the bearing in from the side of the tool with this feature.

A Shimano press-fit bottom bracket is installed into a Giant bicycle. A gold-coloured Enduro tool is used.
One at a time.

Boring numbers 

How an old bearing comes out often indicates how a new one will go back in. Sometimes a bearing or press-fit headset/bottom bracket cup will come out without the aid of tools – providing a clear sign that the press-fit bore is out of round and/or oversized. Meanwhile, a bearing that feels rough when installed but perfectly smooth once removed indicates that the bore may be undersized. However, in most instances, the old bearing will come out smoothly, and you can breathe easy. 

Bearing bore dimensions are complex topics, with ever more expensive specialist tooling to measure them precisely and with variance in what’s deemed acceptable or desired. Unfortunately, bad tolerances do exist within the industry, so it’s good practice to measure at least the bottom bracket and head tube bores before pressing in bearings (or cups). 

On the assumption that you only have access to digital or vernier calipers, you can still get decently close to knowing whether the bearing bore is useable. “If you can insert the ID points of the caliper and then rock them back and forth a little bit until you feel them settle, you will usually get a close measurement. It can help to practice on something with a known measurement so you know what the correct dimension feels like,” said Quade. 

A digital caliper measures the outside diameter of a bearing. The calipers show 28.01 mm.
The bore needs to be smaller than the bearing outside diameter, but calipers to a second decimal point will be needed for these extremely close numbers.

“The other thing about measuring bearing bores, especially those in headsets and bottom brackets, is how round the bore is,” he added. “Because of the method of manufacture and the larger size, these bores are rarely round from the factory regardless of frame material. So taking measurements in multiple directions can give you a better understanding of what their nominal (average) diameter is. If you get a bore that’s marginally egg-shaped, the bearing can usually tolerate it. However, if there’s a lot (.04mm or greater) of mismatch, the bore should really be corrected, especially in a bottom bracket where the bearings get circulated constantly.” 

So what numbers should you be looking for? “[It’s] a bit of a moving target,” said Quade. “The bore should be smaller than the bearing, creating an interference fit. How much smaller depends on the size of the bearing and the application. For bike bearing sizes you’re in the range of .01-.035 millimeters of interference. Press-fit bottom bracket tolerances are generally up to .10mm of interference which is extremely generous but does seem to work with the plastic cups that are common for that application. If you’re installing a bearing directly into the frame, tolerances should be in the .01-.02 mm range of interference. I will caution that hubs are a pretty dynamic part due to the flex and spoke tensions and may differ from industrial standards as a result.” 

This quickly gets into a complicated topic of intended tolerances, frame preparation, component compatibility (true for some press-fit bottom brackets), and potential warranties. Contact the manufacturer if you think there’s a problem and aren’t sure of how to overcome it. 

Working clean 

Whatever bearing or bearing cup you may be installing, it’s important to start clean. “Clean the bearing bore. Have a clean work space, clean tools,” shared CeramicSpeed’s Sollenberger.

Once you’re ready to install, it’s a good time to consult the manufacturer for guidance on how best to prep a bearing for installation. Some of the bigger brands now do a stellar job of this in their model-specific dealer manuals which typically also provide information on required bearing sizes

The topic of frame prep is sure to spark extreme debate amongst all bike mechanics, and I can say there’s no universally agreed-upon approach. Some suggest a dry press-fit interface is best, others use a waterproof grease, some use anti-seize, I’ve seen a few press-fit bottom brackets go in with friction-adding carbon paste, and then there’s the world of bearing retainer compounds. When in doubt, the safe option is always to consult the component or bike manufacturer. 

An Enduro bottom bracket tool, Shimano bottom bracket, and a syringe filled with grease sit on a bench.
Mechanics often have differing opinions on how best to prepare a bearing or bearing cup for installation. I’d suggest following the manufacturer’s instructions, except where they tell you to install something dry.
A variety of Loctite thread locker and retainer compounds on a bench.
Bearing-retainer compounds (not to be confused with thread lockers) are commonly designed for holding cylindrical parts together. They’re a handy item when trying to solve a loose-fitting bearing or cup.

Broadly speaking, I typically install most bearings with a thin coat of waterproof grease on the outer race and/or bore to prevent corrosion. I don’t use anti-seize or other particle-based products in case any excess comes into contact with the bearing in use. Meanwhile, if the old bearing pulled out too easily, but the bearing bore is still in OK condition, then I’ll install the new bearing with a bearing-retainer compound (something like Loctite 608 or 680).

While pushing in the bearing, it’s important to know that when you’ve gone far enough, and that in some cases, it’s possible to go too far. This is especially relevant when bearings sandwich an axle or spacer tube. “I check the bearings in hand with grease and seals, and then once pressed into their bore, I note if there is much difference in the feel. Even better if this can be sampled before and after final preload or assembly is done to pay attention to where, if any, excess load has been applied,” shared Sollenberger. 

A DT Swiss rear hub axle sits on a bench, with two bearings installed on it.
Some bearing arrangements rely on precise dimensions and installation in order to achieve proper bearing preload. Here, installing a bearing too firmly, or not enough, could impact the operation of the component.

In addition to treating the press-fit interface, it’s important to consider how the bearing will be used. Is the cartridge bearing visible once installed, and will it collect grit if externally greased? Or will a bit of extra grease add further protection (almost always a yes for headsets). 

“A thin bit of grease around the outer edge of a seal bearing can aid in basic contamination resistance while not adding any resistance,” said Sollenberger. “Make sure all dust shields/caps, spacers, etc are in good condition and sit properly before calling the project complete. A small detail can be missed, resulting in much more work to go back and identify the issue.” 

Press versus Hammer 

Anyone who worked in a bike shop more than decade ago may remember thumbing through the old chrome socket set in order to find the size that best matches the bearing in hand. From here, an old faithful hammer would be used to gently strike the makeshift bearing drift while (hopefully) putting the bearing straight into its bore. You may have also used that trusty piece of non-marring timber for bigger jobs involving a headset cup while tapping with an even larger hammer. 

Fast forward to today and the most common method for pressing in bearings and bearing cups is a threaded press. Used to squeeze a bearing into place, the press is a low-impact and more easily controlled method, one that provides tactile feedback to resistance and, at least, in theory, aligns off the opposite bearing bore or back side of the bearing seat. Combine with a set of bearing-specific drifts, and you can be sure that you’re at least pressing the right part of the bearing and, hopefully, getting it straight, too. 

A e-bike with new bearings being installed. An Enduro press is used.
Presses offer a smooth and controlled method.

Just as with removing bearings, there is no silver bullet tool when it comes to pressing them. Smaller bearings carry size restraints and, therefore, require smaller tooling that fits within. Meanwhile, larger bearings have more surface area and will experience more friction during the installation – something that typically means a press with greater bending stiffness (larger diameter) in order to keep the bearing straight and the press free from damage. “This, unfortunately, means splitting your pressing duties into two different presses,” confirms Quade. 

Many well-equipped bike shops are likely to have two or three different-sized bearing presses to cover the demands of a modern bicycle. Commonly, a mid-sized bearing press with a threaded rod diameter somewhere between 6-10mm will cover the vast majority of hub and full suspension frame pivots. A press with a 12-20 mm rod would be used for press-fit bottom brackets, bottom bracket bearings, headset cups, and oversized full-suspension pivots.  

Three bearing presses on a bench. A slim Enduro alongside the Abbey Bike Modular and Micro presses.
Vastly different sizes of bearings call for different tools.

Then, of course, there are outlier situations. As with removing cartridge bearings, there are countless product designs on the market that can require lateral thinking and/or more specialist tools in order to service them. For example, sometimes older quick-release hubs with bearings being pressed over the axle won’t fit a traditionally sized press – rather requiring a specialist threaded press with a delicate 5 mm threaded rod (Enduro makes one) or the careful use of a quick-release skewer to serve as the press. Meanwhile, some full-suspension frames will be so tight on clearance that you may need a press without handles (or removable handles) or perhaps even with a shortened length of threaded rod. 

Adding to the stress of all of this is that you’d ideally match the inner diameter of your bearing drifts to the press rod diameter. Having this matched will make keeping everything aligned and the bearings straight easier. 

That all said, threaded presses aren’t the only method. If you can keep the bearing perpendicular to the bore and press on it correctly, then a hammer can be used. For example, DT Swiss’ own tools and instructions employ a bench vice, precise-fitting bearing drifts, and a mallet. Meanwhile, my gold standard for bearing tools, the now-discontinued (but perhaps returning one day) Noble Bearing Install tool uses a hammer to strike a bearing drift that is aligned with a solid brass guiding rod that then runs through a vice-mounted drift – it’s one of the only systems that ensure complete bearing alignment across opposing bearing bores. Of course, such tooling requires the part to be vice-mounted, and so it’s not practical (or even applicable) for tasks such as on-bike full suspension frame pivots, bottom brackets, or headsets.   

A Noble bearing install tool is used to install a bearing into a full suspension rocker link.
The Noble tool (currently discontinued) uses a guiding rod to ensure proper alignment. A hammer strikes the top part.

Other methods that ensure perpendicular pressing may be acceptable too. For example, a bench vice can double as a press (assuming you have appropriate drifts). And even my faithful Knipex Pliers Wrench is a popular tool with pressing bearings into some tightly confined full suspension frame pivots (typically the 250 mm size). 

Dedicated drifts versus cheap hacks 

Bearing drifts sit in direct contact with the bearing, they need to be consistently flat and support the bearing at a suitable point. They also need to be specifically sized. Too small and they could damage the bearing; too big and they could get stuck against it. 

 It’s the Wild West when it comes to bearing drifts. Some component designs benefit from a drift with a centre guide to help keep everything aligned (aka, inner guide drifts). Other components have an axle that sits proud, so the drift must offer clearance for the axle (outer guide drifts). Sometimes those outer guide drifts need extra clearance for a protruding step in the axle. Some components have the bearing bore inset into the component, and therefore you need a drift (or a stack of drifts) to reach further. Some bearings have extended inner races, and need shaping in order to not make contact. And then on top of all of that, there are the dozens of bearing sizes to contend with – for example, Abbey Bike Tools produce 29 sizes of drifts just for cartridge bearings – and you can bet there are some weird sizes not offered. 

Five different types of bearing drifts in a single size sit on a bench.
These five drifts are all for 6804 bearings, but each serves a subtly different ideal purpose. For example, the Enduro over-axle drift on the far left is cut away to clear a raised axle edge that protrudes past the bearing. Meanwhile, Abbey’s Bike Tool’s black drift (middle) is made long to press bearings deep into a part (such as some freehub bodies) and to fit over an axle.

The good news is that there are a number of common bearings used across bicycles, and more casual mechanics will likely be able to make do with just a small handful of suitable drifts. More good news is that companies such as Wheels Manufacturing, Abbey Bike Tools, and Bearing Pro Tools offer size-specific bearing drifts for individual purchase. Adding to the good news, a 3D printer is an ideal solution for creating one-off bearing drifts as you need, and it’s a simple shape to draw. And heck, even that old socket set may suffice if you happen to have a size that perfectly matches the outer diameter bearing race (be sure it’s not pressing on the seal but is also a hair smaller than the bearing outer diameter). 

Alternatively, there are popular workshop hacks. Steel washers of a suitable diameter can be used (or ground to match such a diameter). Some like to use the old bearing as a drift, but the danger here is that the bearing bore has more depth than the bearing being installed, and before you know it, you’ve sandwiched the old bearing against the new and given away your hard-earned cash to the swear jar. 

In the end, bearing drifts seem to amass themselves over the years, and even though my collection is more than 100, I still occasionally find myself needing something ever so slightly different. 

A drawer full of bearing drifts organised by size.
The collection is never done.

The best, the cheapest, and the most universal presses 

Presses can be cheaply created in the aisles of a hardware store from some threaded rod, washers, and nuts of the correct size – though these can be fiddly to keep aligned in use. For not a lot more, there are countless pre-made options littered across Amazon, eBay, and Aliexpress of varying quality levels – I’ve seen some bend with first use while others are serving duty in bike shops. 

A basic threaded rod, threaded nuts, and some bearings sit on a bench.
Presses can be as simple as this.

Meanwhile, the specialist tool manufacturers sell presses made to higher tolerances, with hardened steel rods, and often using a specific thread geometry that better handles repeated loads. “Acme threads are common in greater industry for various things, including machine tools and vises”, explained Quade.  “They have a more coarse pitch than a typical 60* imperial or metric thread, which gives more surface area leading to increased durability. The coarser pitch also means fewer turns to set up and press the bearings.”

Many professional-grade presses, such as those from Enduro and Wheels Manufacturing, have handles that isolate binding between the bearing drift with a low-friction bushing. And then, at the top tier, presses from Abbey Bike Tools, CeramicSpeed, and a few others will add a thrust bearing for even smoother operation and less manual input. 

A growing number of professional-grade presses now offer a form of quick-release nut, allowing you to quickly assembly and dissemble the press without having to wind a handle along the full length of spare threaded rod – it can be a big time saver given that you may need to remove the press to check how far a bearing is seated and/or whether the preload is correct. 

Abbey Bike Tools Micro press used to install a small bearing into a rocker link.
A thrust bearing helps to isolate forces, so much so that this press (made by Abbey) needs no leverage-creating handles.
CeramicSpeed and Wheels Manufacturing press tools on a bench.
Presses with quick-release features are of huge benefit in busy workshops. Wheels Manufacturing, CeramicSpeed, Park Tool, Unior, Alt-Alt, Abbey, and many others offer such things.

Another benefit to professional-grade presses and those sold by specialist sellers is access to spare parts. Threaded rods can bend through misuse and other pieces can wear out. Buying from AliExpress or similar may be cheap, but you’ll likely be unable to replace singular pieces easily. 

If shopping for a press (or presses), it’s a good time to look for one that includes a range of useful bearing drifts – like buying a bicycle versus building one, it’s often cheaper as a complete product. There are countless kits to consider, below are three strong examples that cater to smaller bearings found in hubs and full suspension frame pivots.  

At the cheapest end sit the generic kits sold on AliExpress, eBay, and Amazon. I paid about US$32 for mine, and aesthetically, it’s a close copy to the original Enduro press found in many shops across the globe. Compared to the original Enduro, the threaded shaft exhibits more flex, the action isn’t as smooth, and the handles continue to work loose. The provided drifts typically do the job, but a few have burrs or deep scratches beneath the anodising which suggests a low bar for quality control (which means a wide mix of positive and negative experiences). Despite such flaws, the kit suits casual users, but anyone who values quality tools would benefit from spending more. 

An Enduro press sits ontop of a Chinese-made copy.
Low-cost generic presses are often a close aesthetic match, but there are real differences in quality.
A close up of the cheap bearing drifts from Aliexpress. The image shows scratches and burrs.
Some of the supplied drifts look like factory seconds.

While not available in all global markets, I’ve come to recommend the Alt-Alt kits (covered previously) for casual users and professionals alike. While built on a simple metric threaded rod and with Acetal (plastic) drifts, the various available kits each work on a modular design, making it arguably the most versatile option in the market. It’s one of the few kits on the market with guiding pieces dedicated to keeping the press in alignment from one bore to another – a similar concept to what my beloved Noble tool does. Even with my vast metal drifts collection, I still regularly reach for Alt-Alt’s various sleeves to overcome fitment struggles. Expect to pay approximately US$235 for the full menu on this one, but plenty of smaller (cheaper) options do exist. 

An Alt-Alt press in use.
The Alt-Alt kit is basic but offers a huge amount of user options.
The full Alt-Alt kit is displayed.
Alt-Alt sells multiple kits, which you can then piece together into one super kit. It’s kind of like the Power Rangers.

Sitting closer to the top end, the Enduro BRT-060 (US$300) provides a durable kit that has proven to be the benchmark for easily removing and installing many tricky full-suspension pivots while being a solid option for hub work. The stand-out feature is the BRT-051 pivot bearing removers (one highlighted In the removing cartridge bearing article) and the press handles that can be swapped for 15 mm spanners if you require more working room within full suspension jobs (or space in the toolbox). 

What I use 

If it’s not evident, I use a variety of threaded and hammer-based presses which change given the task at hand. 

A drawer full of bearing-related tools, all neatly stored within a foam lining.
It’s a problem.

For hub bearings, I’m mostly reaching for the now-discontinued Noble bearing install kit that employs a hammer to drive a guided drift into place. It’s proven to be a faster but, more importantly, more consistently precise option. Abbey Bike Tools recently bought the intellectual property of these tools, so hopefully, this one will make it back to production.

In instances where an axle is too small in diameter or its shape isn’t conducive to the Noble kit, then you’ll find me using threaded presses. The Enduro BRT-045 is my pick for over-axle quick-release hubs. And for more regular-sized hub bearings, I’ve taken a liking to Wheels Manufacturing’s 3/8 Press Handle with the matching quick-release action Press Stop. Although the quick-release press head in CeramicSpeed’s Wheel Bearing Press Tool kit is a dream to use, and it’s another example of a kit that includes pieces to hold the press rod and drifts in alignment.

For full suspension frame pivots the clear winner for me is the Enduro BRT-060. That said, there are very rare situations where the thinness of the Real World Cycling Modular Handle Set cannot be beaten. 

Getting to the bigger presses, almost all of my bottom bracket bearing and press-fit cup installations are handled by the Enduro BRT-002 and BRT-003, which are also my favourite removal tools for such tasks. As a slight tangent, ZTTO (a brand commonly seen on AliExpress) has a low-cost copy to this tool that works about 75% as well, but is at a comparably laughable cost. 

Enduro bottom bracket tools.
Enduro are responsible for my favourite press-fit bottom bracket tools.
Aliexpress bearing tools on a bench.
Meanwhile, ZTTO makes a kit that imitates the split collets that make the Enduro tools so good.

Meanwhile, for headsets, the ultra-smooth action of the Abbey Bike Tools Modular press is my first pick. My second choice here would be the press from Wheels Manufacturing – a solid option especially given the asking price. Both of these are also the perfect tool for bottom brackets, I just find the dedicated nature of the above Enduro tools to be quicker for the task. 

Of course, I’m not mentioning many other solid presses suitable for headsets and bottom brackets, including the popular Park Tool HHP-2, Cyclus’ impressively well-priced alternative, or Pedro’s lesser-known option that also spins with a thrust bearing. All of these absolutely do the job, but I’ve either lost skin through using them (the Park is a known pincher!) or simply found less cumbersome options to no longer use them myself. 

Wrapping up 

Those summing up the cost of all this will soon realise that being tooled up to correctly install every single bearing configuration on a modern bicycle properly is no cheap task. It’s an area of tooling that I’m deeply invested in because I enjoy the subject matter, and while such tooling certainly helps to make the tasks more enjoyable, I could also reach the desired outcome with half as many options.

If replacing bearings seems like a task you’d like to tackle, then the takeaway from this article should be that you don’t need to (but you can) spend a fortune to do occasional bearing install jobs. And it’s a category that you can expand into over time. Just take your time in removing the bearing, finding a suitable replacement, and installing it carefully. 

Coming up 

Threaded will return in two weeks, it’s safe to say the next one won’t be specifically about bearings – it’s time to put a seal on that topic (for now). 

If you haven’t already, be sure to read all about smoothly removing cartridge bearings and how to find the right replacements.

Like all content on Escape CollectiveThreaded is wholly funded by our members. If you haven’t already, please subscribe to the Threaded newsletter (it’s free) so you don’t miss future fortnightly geek-outs. 

What did you think of this story?